Where can I add a membership policy?
You can add membership policies under Settings.
1. Log in to the Wakandi Admin Panel.
2. Click on Settings in the left menu and then the submenu Policies.
3. Select Add new to add a new policy.
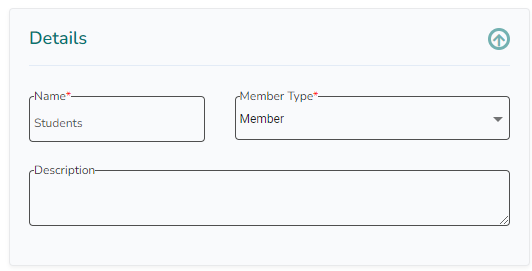
4. Fill in the name, member type and a description.
4. Define the max and min number of Next of Kin.

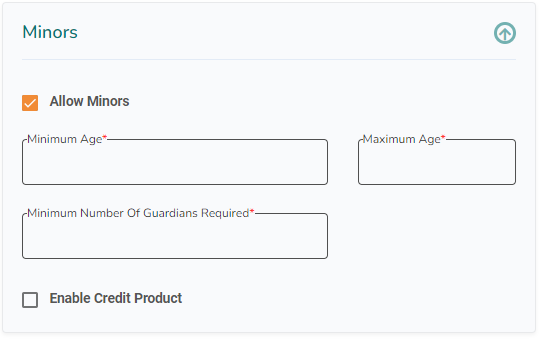
5. Define that you allow minors as members and set a minimum and maximum age. You must also define minimum number of guardians.
By ticking of the Enable Credit Product, you allow the minors to apply for loans, too.
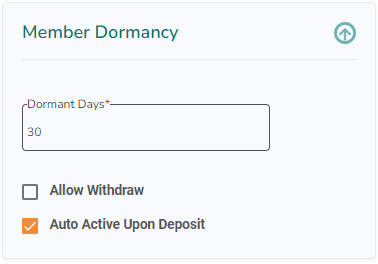
6. Under Member Dormancy, you can define a dormant member.
Set the number of days, and decide if they should be allowed to withdraw and to be automatically active upon deposits.
7. Set the fees related to the member policy.
a) You can add a Registration Fee, and connect it to a ledger in the accounting system (needs to be created).
b) If you want the members to pay a fee regularly, you can add a Subscription fee, connect it to a ledger, and set a frequency (daily, weekly, monthly or yearly).
If you want the fees to apply to existing members connected to the policy, tick off the box.

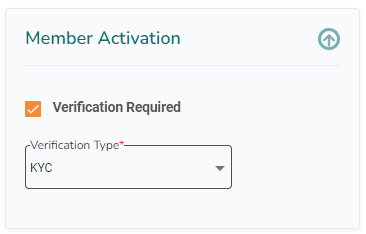
8. Member Activation is related to Know Your Customer (KYC)
and how strict you want to be in requiring KYC before a member can start using your services.
The alternatives:
- The member received an email that he needed to verify.
- Phone: the member receives an SMS with an OTP code that he needs to verify.
- KYC, the member must provide a valid national ID card. A picture of this must be uploaded to the customer’s document tab.
- Manual, a button is available for the Admin to push on the member list.
- Any allows all the options above to activate a member.
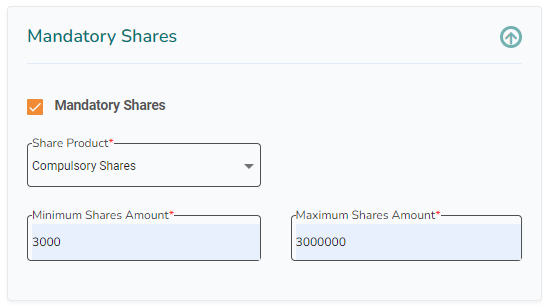
8. Choose if you want mandatory shares or not. If you choose, select the Share product, and the minimum and maximum shares amount.
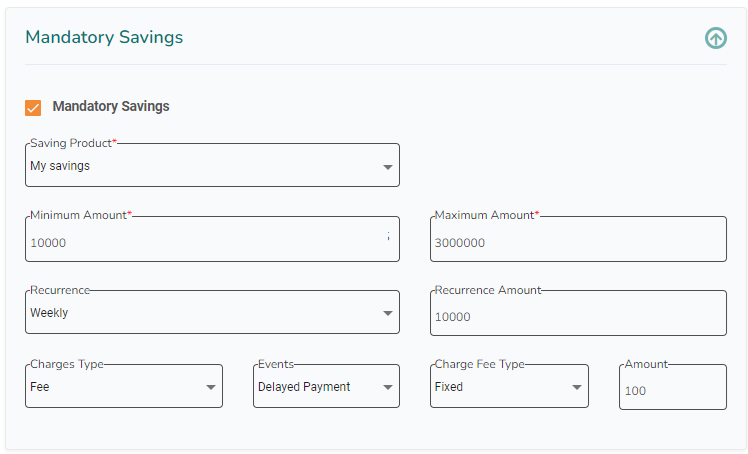
8. Choose if you want mandatory savings or not. If you choose, select the Savings product, and the minimum and maximum shares amount. You can also define recurrence (daily, weekly, monthly, quarterly, six months or yearly) with a fixed amount. In addition, you can choose to add a penalty fee if it is not paid.
8. Click Submit, and the member policy is send to approval.
