You can add both voluntary and compulsory savings products.
1. Log in to the Wakandi Admin Panel.
2. Go to Settings and choose Products.
3. Select Saving Product.
4. Click on Add new.
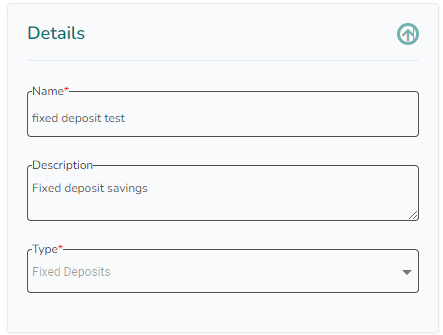
5. Fill in the details for the new Savings product.
 The different types are
Savings, Current, Deposits, Fixed Deposits and Recurring Deposits.
6. Fill in the terms for the new Savings product.
- If you want to add interest to the savings product, choose the interest you have configured and the calculation method.
- On Fixed deposit, you can define a Lock-in Period, too.
- If you allow members to be Guarantor, using the savings on this product, tick of the box for this.
- If you allow savings on this product to be used as collateral, tick of the box for this.
- If you tick of the Default Auto Debit box, outstanding fees to the Saccos will be paid from this product. Like recurring member fees.
 The Maximum Transaction amount will function as a withdrawal limit.
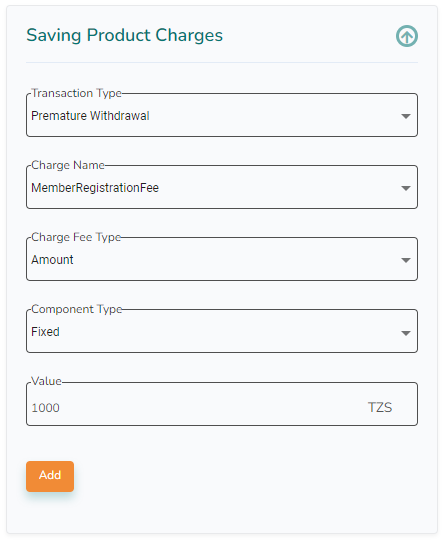
7. Fill in any charges for the new Savings product. Based on the savings type you choose, you can add different charges:
For Fixed Deposit
- Select Transaction Type Premature Withdrawal.
- Pick the charge you have set up for the savings product.
- On the Charge Fee Type, choose the percentage or amount.
- The component type defines a tiered-based setup or Fixed.
Other Savings
- Select Transaction Type Contribution or PayOut
- Pick the charge you have set up for the savings product.
- On the Occurrence, choose the first transaction or all
- On the Charge Fee Type, choose the percentage or amount.
- The component type defines a tiered-based setup or Fixed.
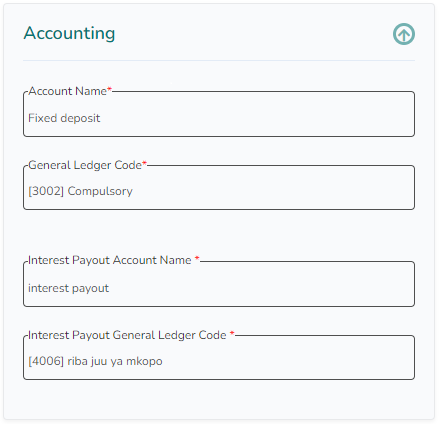
8. Connect the Saving product to the correct ledgers in the accounting system.
9. Click Save
Relevant article


