How can I add an administrator?
You can add users with different rights, so they only see and can do relevant tasks.
1. Log in to the Wakandi Admin Panel.
2. Go to Settings and choose Administrators.
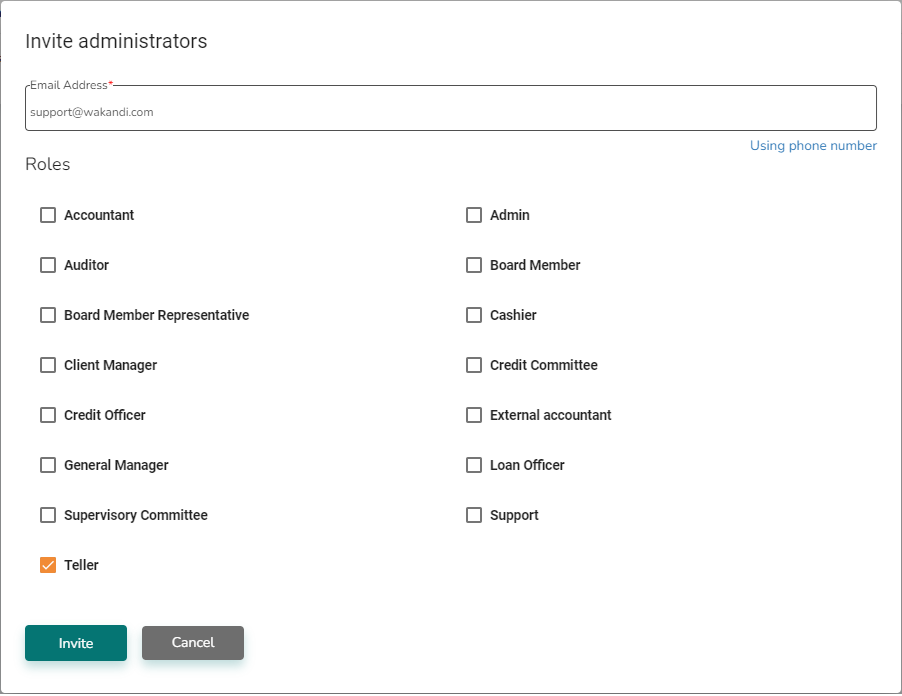
3. Choose Invite Administrator.
4. Enter the administrator’s mail (you can also use phone number)
5. Assign the intended rolt for the administrator.

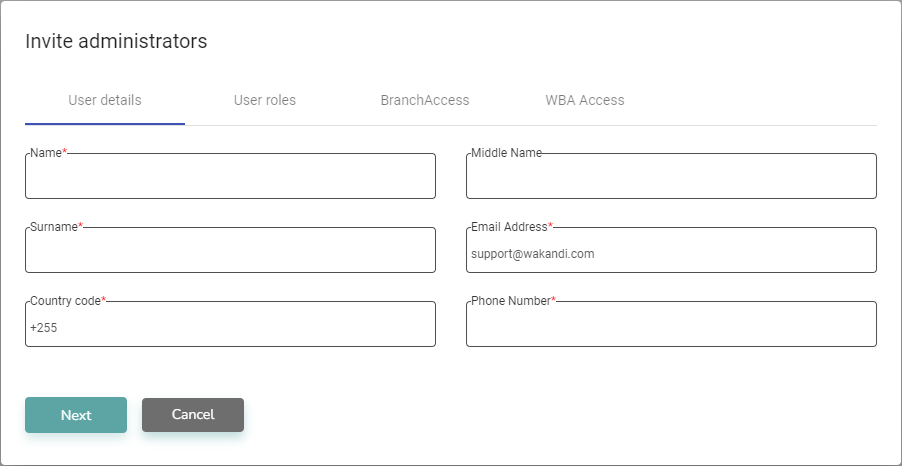
6. Add user details to the administrator.

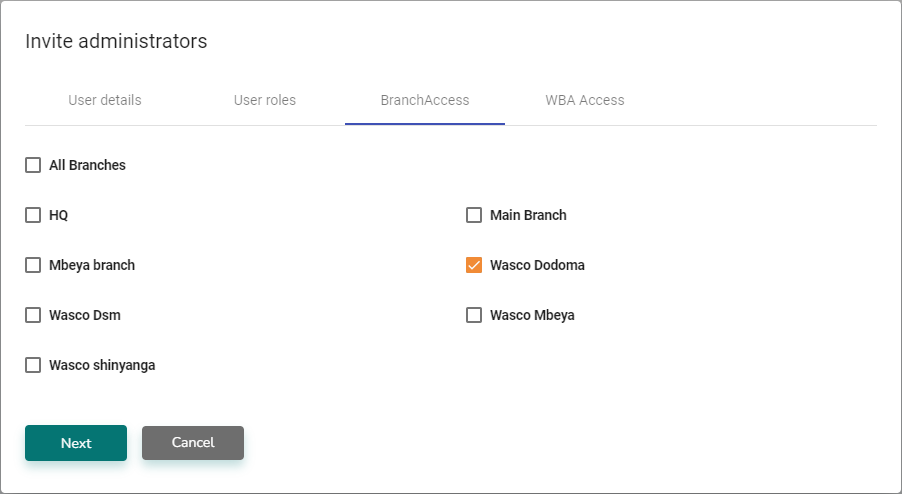
7. Click på BranchAccess and select which branches the administrator should have access to.

8. Click Next and tick off WBA Access if the admin should be able to see the Wakandi Business Account.
9. Click Save and the administrator is added to the list.

10. The administrator receives a link in an invitation mail / SMS, which he must click.
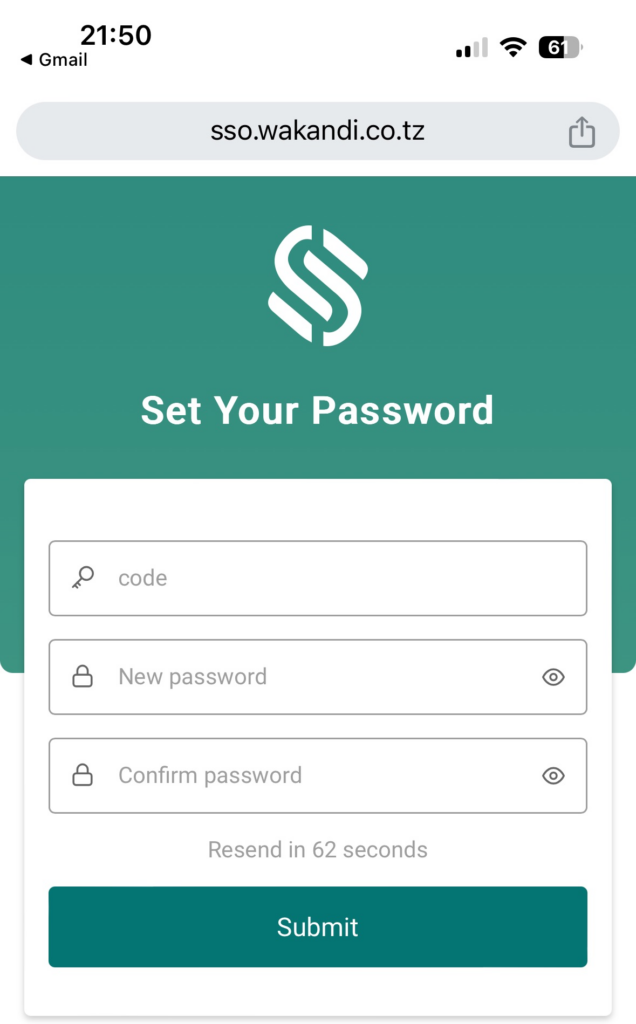
11. When he clicks on the link, he will receive a One Time Password (OTP), and this page opens:

12. The administrator must enter the OTP code, set a password, and click Submit.
13. After logging in the first time, his status is set to Active.
