Add a member's KYC documents and address
Summary
Attach a member's identity documents and record their address, so their KYC record is ready for approval. About 3 minutes · 5 steps. Also called: KYC documents, upload ID, member address, residence.
Sign in with your email to read the rest of this article, track what you have finished, and earn your certificate.
Sign inPrerequisites
- A CAMS sign-in with rights to edit a member.
- The member's identity documents as files you can attach.
- Their address details.
Step-by-step
Sign in to CAMS Admin.
In the left menu, click Client and open the member's profile (How to find a member shows the search).
Find the row of tabs under the header. Supporting details live on Residence, KYC, Income, Assets and Bank; this article covers the first two.
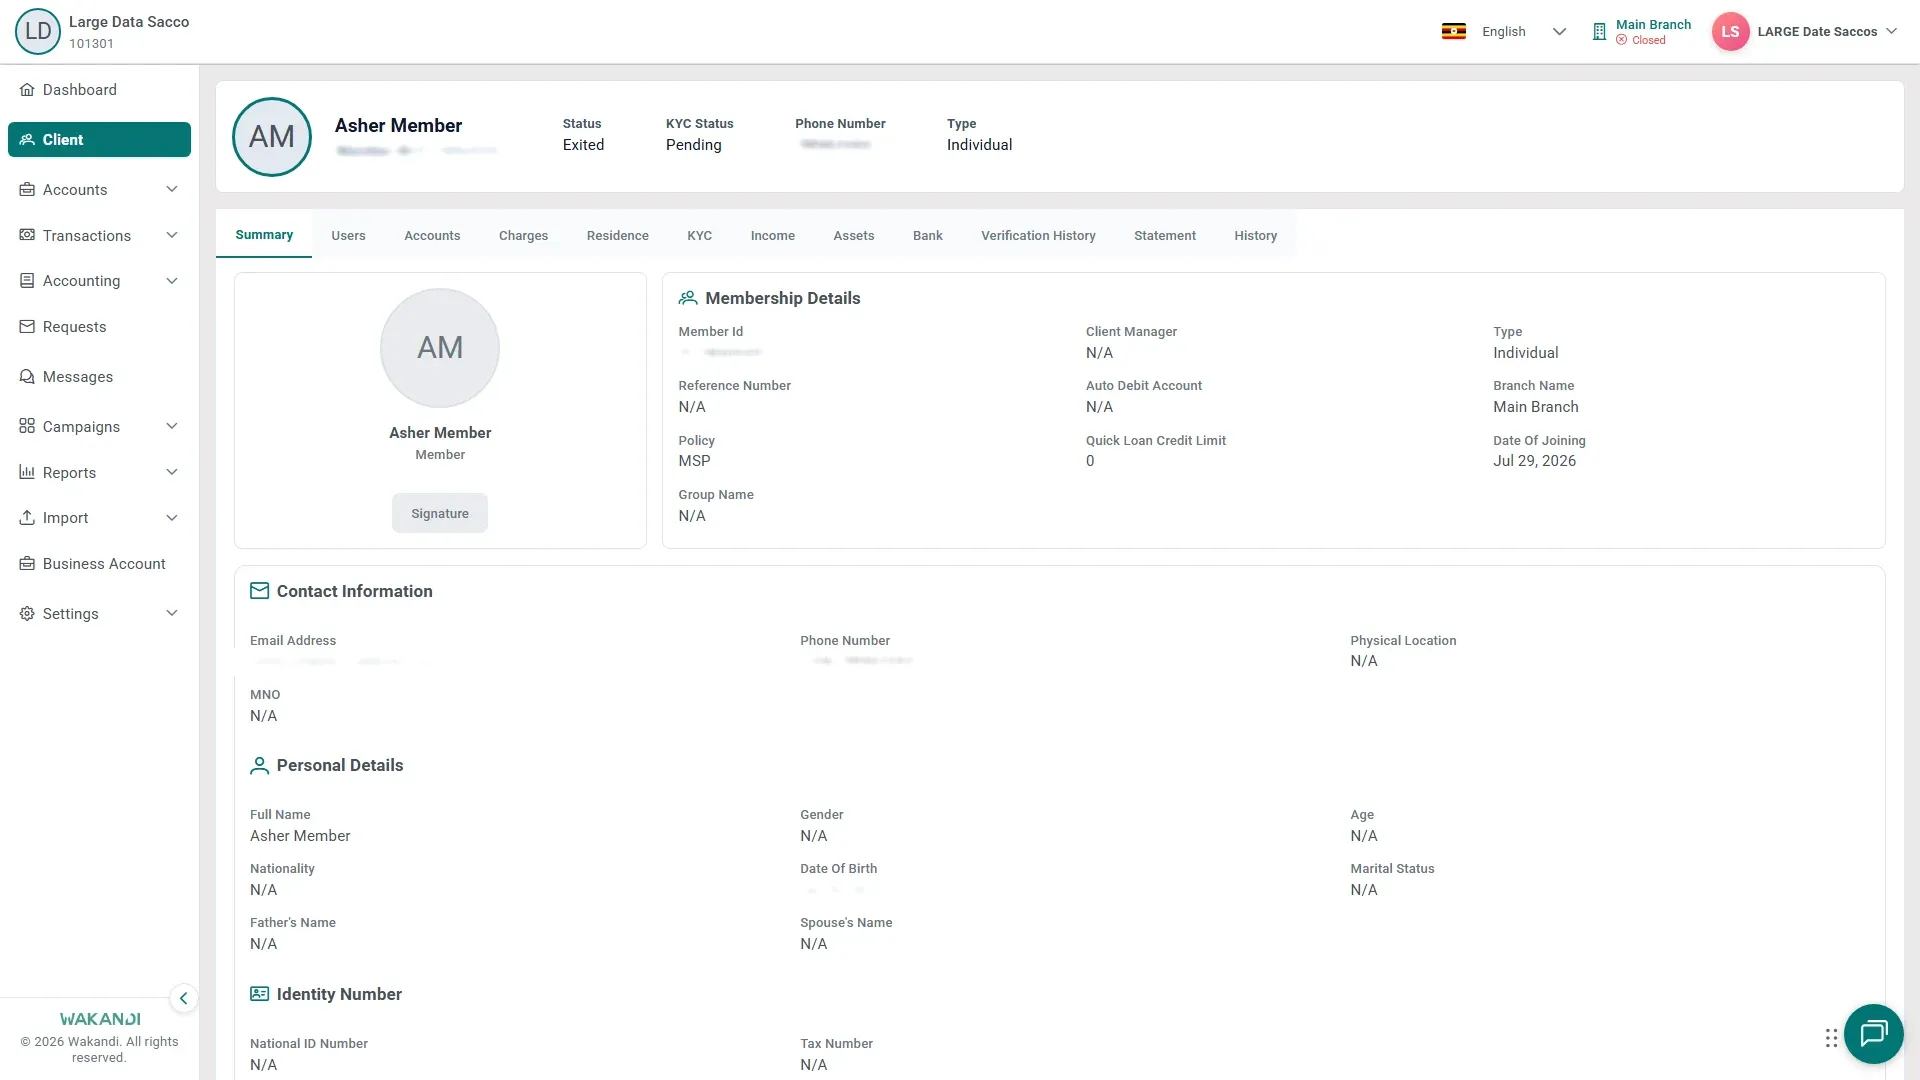
Figure 1: The member profile with the row of tabs where supporting details are stored, including Residence, KYC, Income, Assets and Bank Click the KYC tab, then Add KYC. Choose the document type, attach the file, add Comments if needed, and save. The document appears with an Uploaded Date.
Click the Residence tab, then Add Residence. Fill in House Number, the address lines, Area / Ward, District / City, Region / State, Country and Pincode / Zip, then save. The address replaces No data available.
Note: Each tab saves on its own, so you can add documents today and come back for the rest later.
Next: income, bank and assets, in the following article. When the documents are complete, KYC is approved on the same tab — see Approve a member's KYC documents.
Common pitfalls & FAQ
- A tab says "No data available". Nothing is saved there yet, or you left the tab before saving. Add the entry again and save while the tab is open.
- Does uploading documents finish KYC? No. KYC Status in the header stays Pending until someone approves on the KYC tab.
- I cannot see a tab I expected. Tabs depend on your SACCO's setup and your access rights. Ask your administrator.