Import a list of members from a spreadsheet
Summary
Load many members at once from a filled spreadsheet, and check every row before it reaches your register. About 4 minutes · 8 steps. Also called: bulk member upload, member template, mass onboarding.
Sign in with your email to read the rest of this article, track what you have finished, and earn your certificate.
Sign inPrerequisites
- A CAMS sign-in that can open Import. Submit shows only with import edit or accountant permission.
- Each member's branch, membership policy, member type and joining date.
- The exact policy names your SACCO uses, from Settings → Policies → Membership Policy.
Step-by-step
Sign in to CAMS Admin.
In the left menu, expand Import and click Member. The list of past upload batches loads.
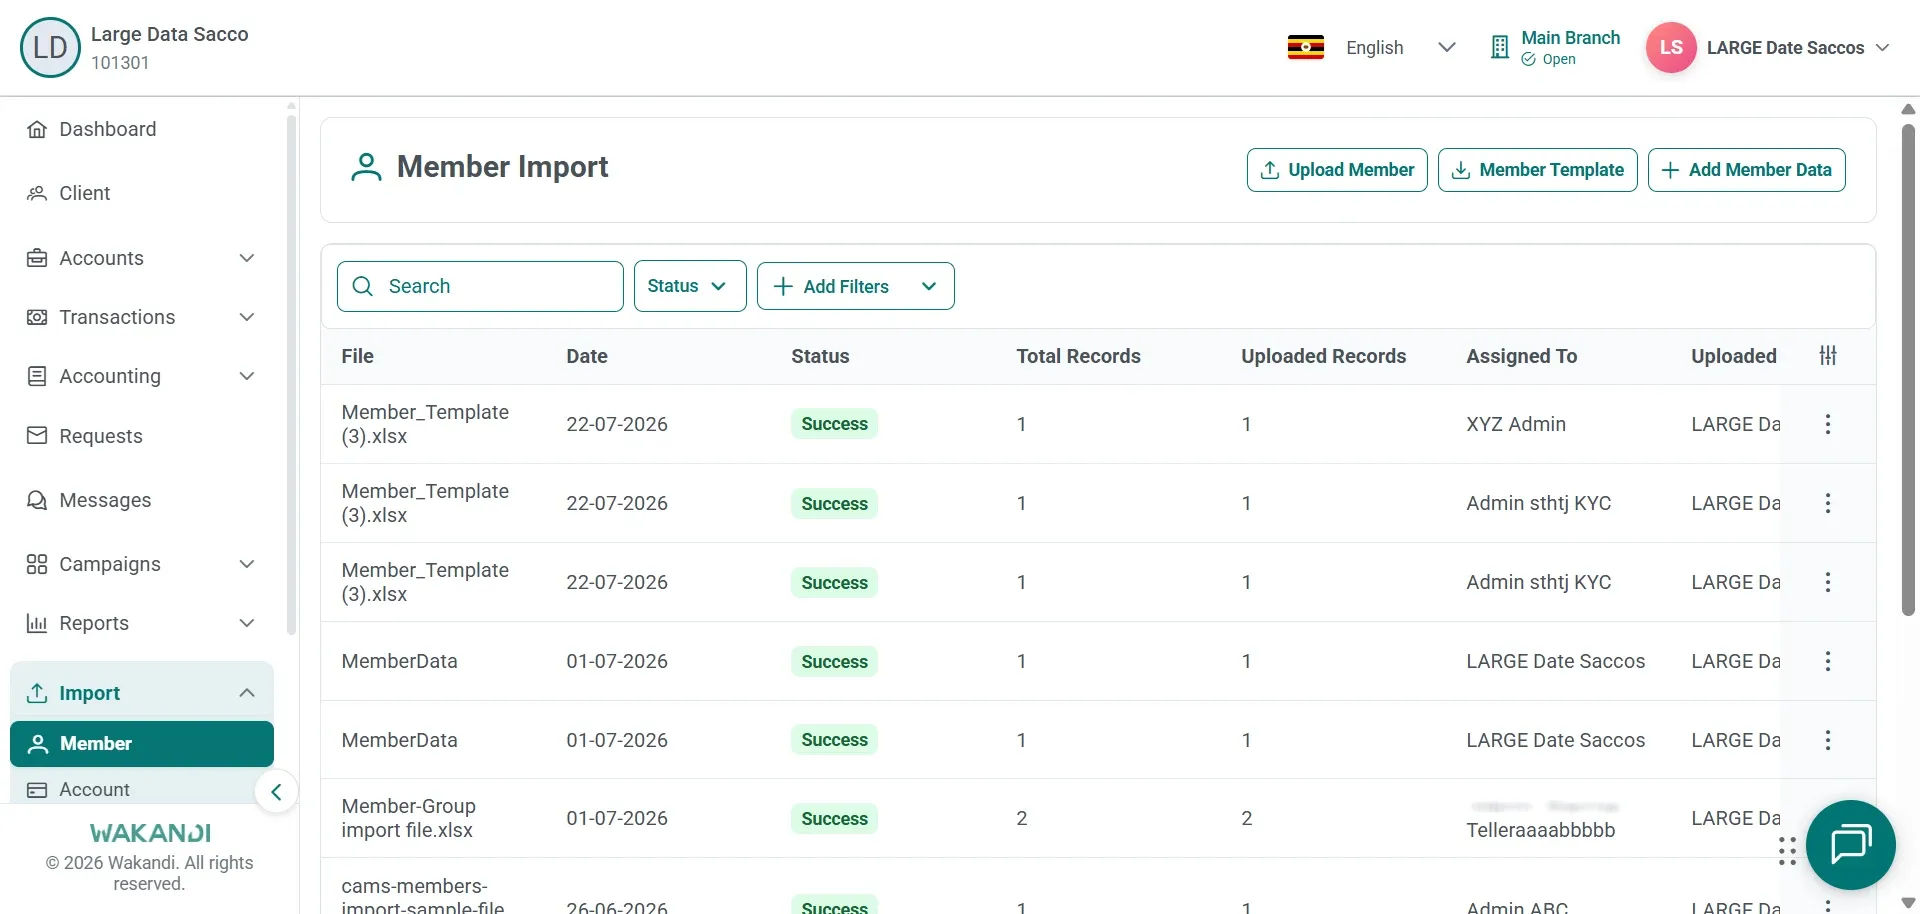
Figure 1: Member Import page listing past upload batches beside the Upload Member, Member Template and Add Member Data buttons Click Member Template. Your browser downloads a file such as Member_Template.xlsx.
Fill one row per member. Keep the single header row, and do not rename the columns. Save as .xlsx, .xls or .csv under 10MB; split a very long list into several files.
Back on Member Import, click Upload Member, then Select File, and choose your file. The file name appears under the selector.
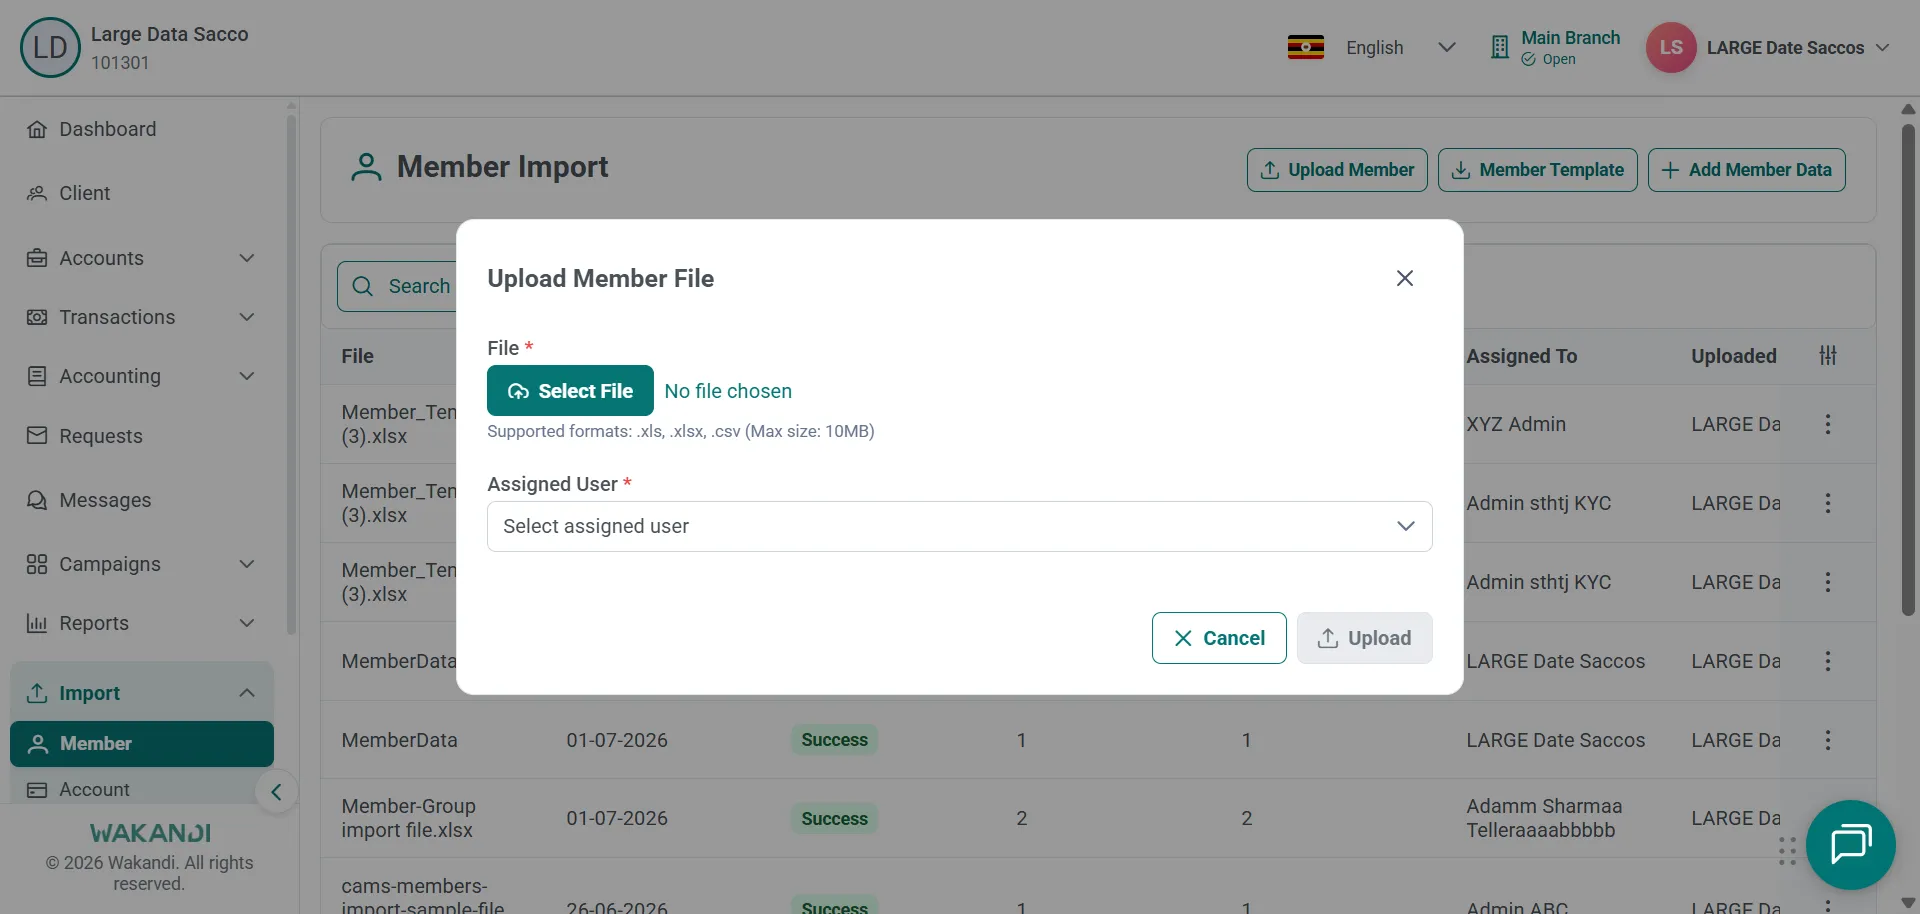
Figure 2: Upload Member File dialog with Select File, supported formats note, Assigned User picker and greyed Upload button Open Assigned User and pick the person who will own this batch, then click Upload. Wait for the success message; the batch appears as a new row in the list.
Click that row to open Member Import Details, then the Imported Data tab. Read each row's status and check Branch Name, Membership Policy and Member Type.
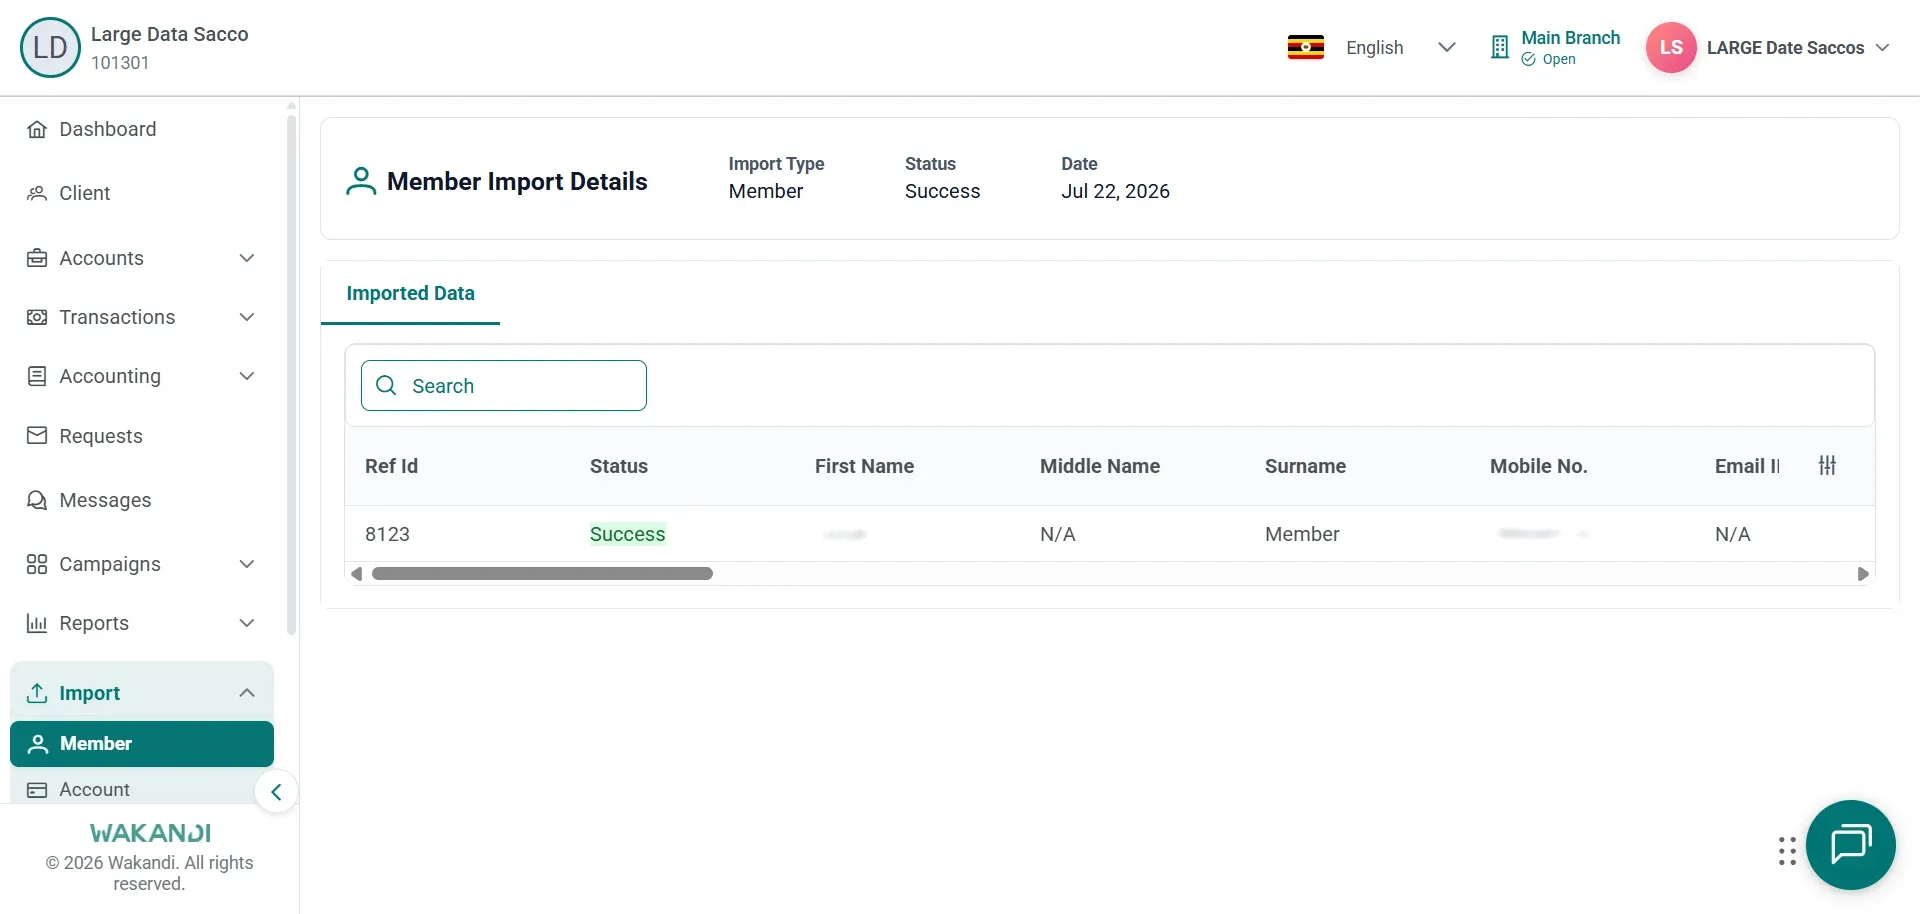
Figure 3: Member Import Details header with the Imported Data tab open, showing a member row marked Success
Warning: Imported Data is your last look before the members reach the register. A wrong branch or policy here lands on every row it touches.
- When the rows are correct and Submit is available, click Submit.
Common pitfalls & FAQ
- Upload stays greyed out. Both File and Assigned User are required. The button turns on once you have set both.
- The status says In Progress or Error. Wait for In Progress to finish — Submit hides while a batch is in progress or already submitted. For Error, open the batch and read the row statuses; where many rows failed, fix the source file and upload a fresh batch.
- The template looks different from last time. Download a fresh one after a product upgrade, because columns can change.
- I have only one member to add. Use Add Member Data on Member Import instead of a file.