How to add members to a group
Summary
Add existing members to a group, so their savings, loans and roles are managed under the group's profile.
About 3 minutes · 6 steps. Also called: group membership, Add Group Member, join group.
Sign in with your email to read the rest of this article, track what you have finished, and earn your certificate.
Sign inPrerequisites
- A Wakandi Admin Portal sign-in that shows Client in the left sidebar.
- The group already created — see How to create a group.
- Each person already registered as an individual client. See How to add a new member.
Step-by-step
Sign in to the Wakandi Admin Portal.
In the left sidebar, click Client, then search for the group and open its profile. Its Type column shows Group.
Click the Members tab. This lists who belongs to the group, with each person's role.
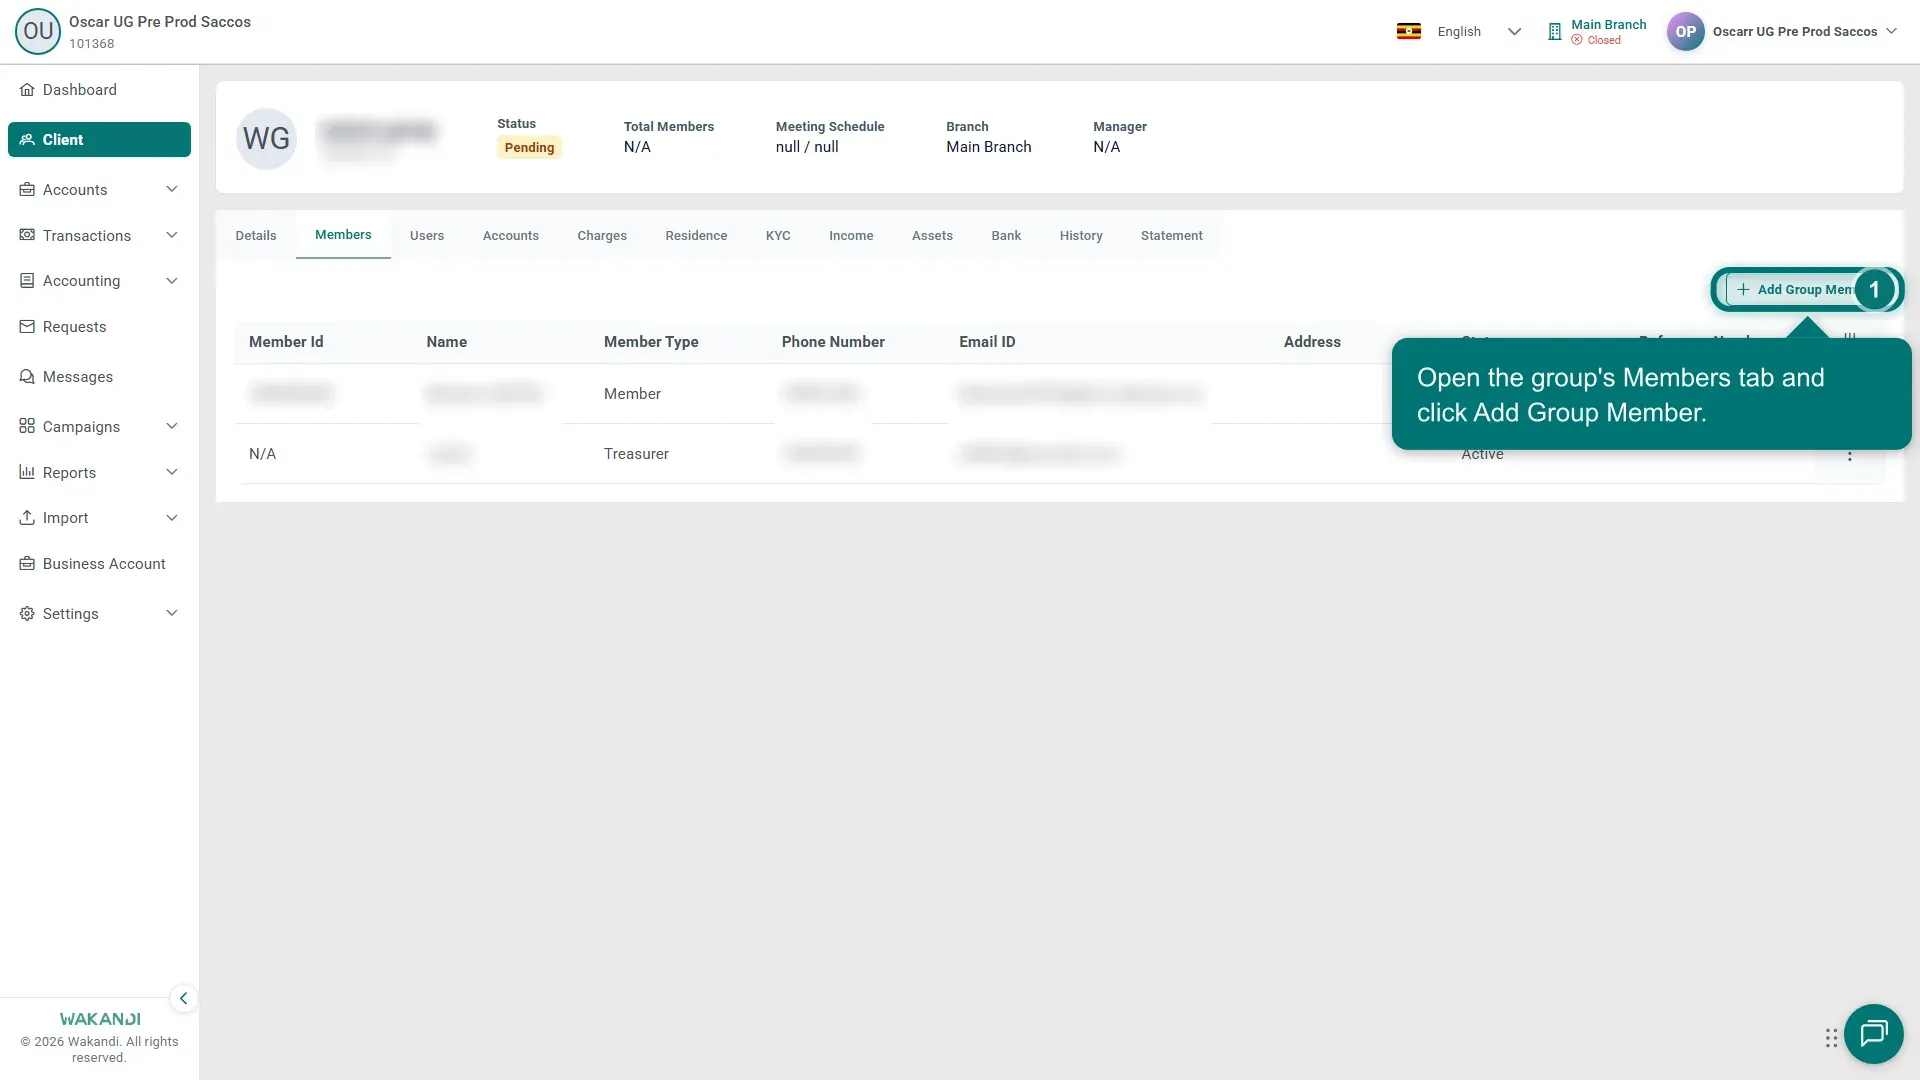
Figure 1: Group profile Members tab with the Add Group Member button Click Add Group Member.
Search for the member, select them, and set their role in the group — for example Member or Treasurer. Save.
Confirm the person now appears in the Members list with the right role and an Active status.
Common pitfalls & FAQ
- Members tab or Users tab? Members is the group's membership list. Users is sign-in access to the group's own account — a different thing.
- The person is not found in the search. They must exist as an individual client first. Register them, then add them to the group.
- Roles matter. Officials such as a Treasurer are set here; pick the role your group's constitution assigns.