How to create a group
Summary
Create a group client, so several members can save, borrow and be managed together under one profile.
About 3 minutes · 6 steps. Also called: group registration, AddGroup, group client.
Sign in with your email to read the rest of this article, track what you have finished, and earn your certificate.
Sign inPrerequisites
- A Wakandi Admin Portal sign-in that shows Client in the left sidebar.
- A membership policy for groups — set up under Settings, then Policies. See How to create a membership policy.
- The branch the group belongs to.
Step-by-step
Sign in to the Wakandi Admin Portal.
In the left sidebar, click Client. Wait for the client list to load.
Click AddGroup above the list. The Create New Group page opens.
Under Membership Details, select the Policy and the Branch Name. Relationship Manager is optional.
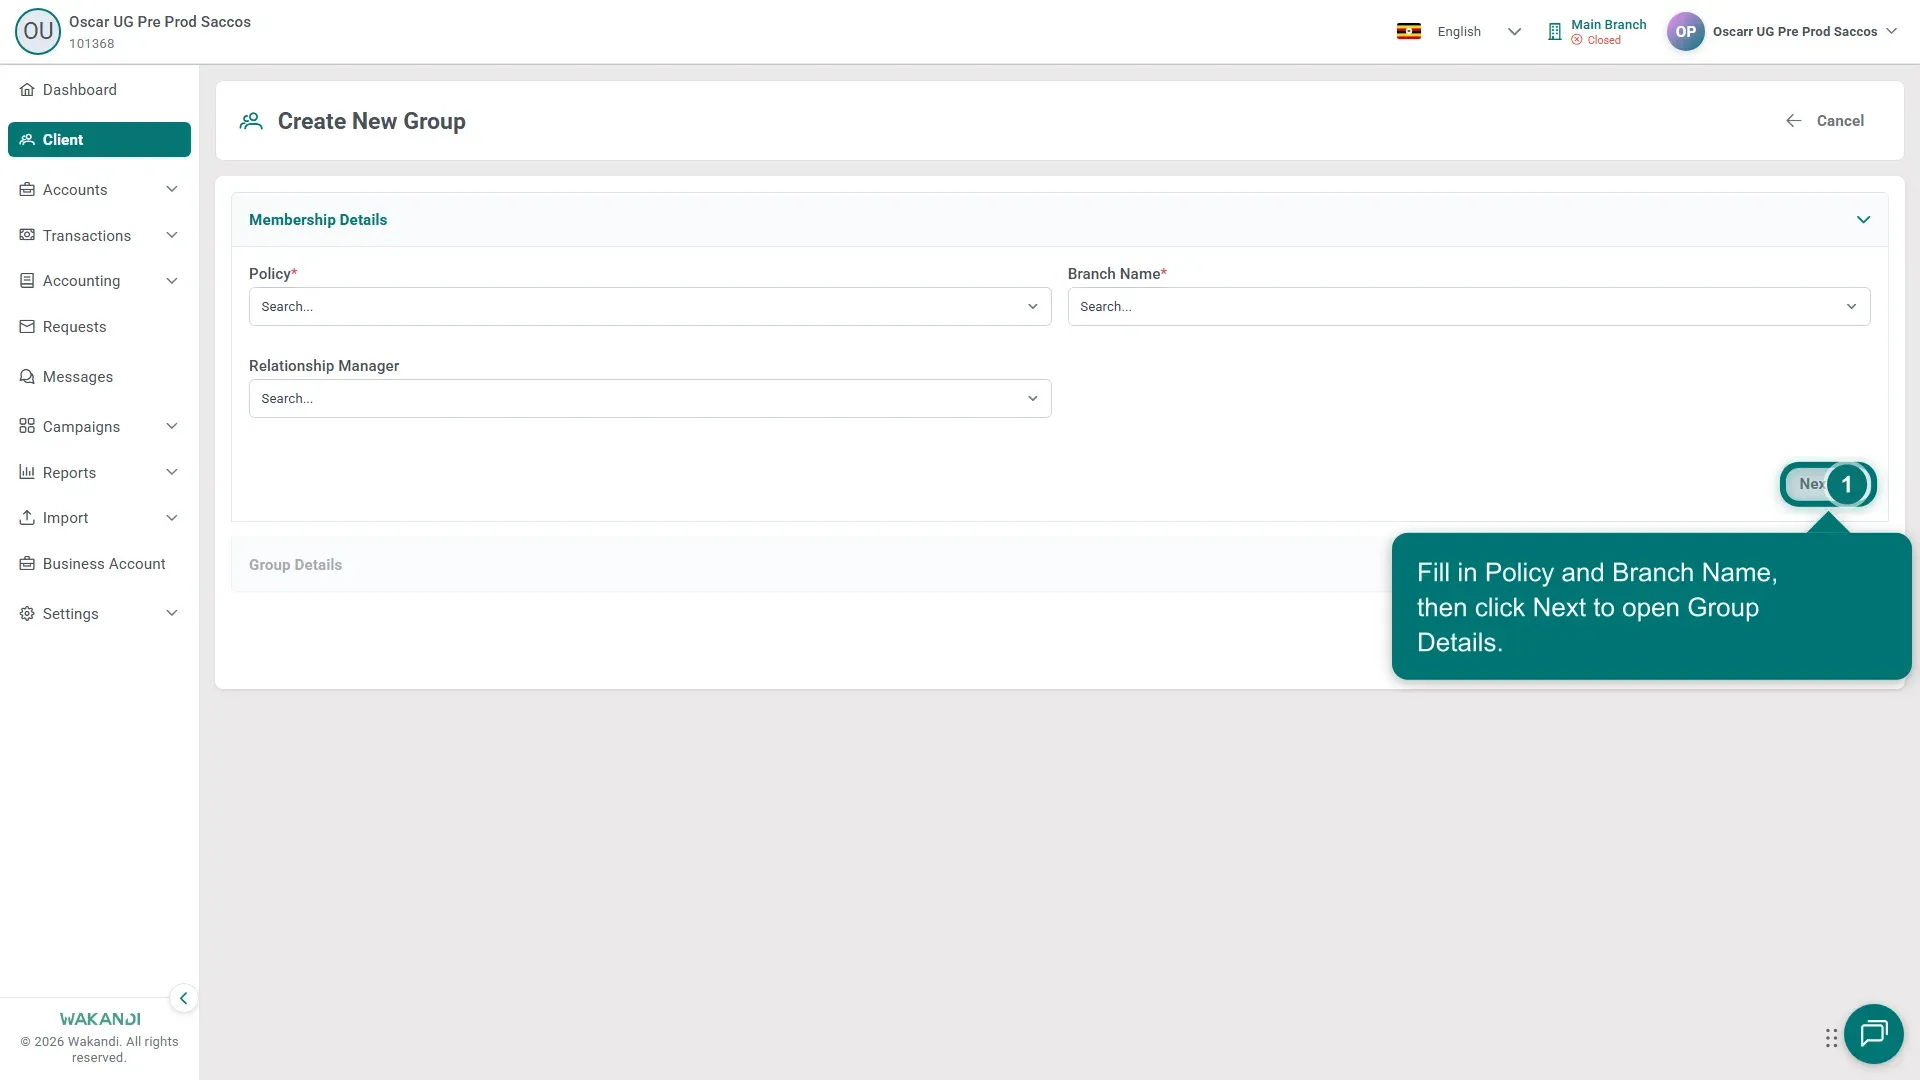
Figure 1: Create New Group form with Policy and Branch Name fields Click Next to open Group Details. Enter the group's name and the other details your policy requires, then click Create.
Confirm the group appears in the client list with Type showing Group. A new group often shows Pending until it is reviewed and activated.
Common pitfalls & FAQ
- Policy or Branch will not accept a value. Both are required. If the Policy search finds nothing, a membership policy that allows groups has not been created yet.
- Where do I put the members? Members are added after the group exists, on the group's Members tab — see How to add members to a group.
- The group shows Pending. That is normal for a new group. Activation follows your institution's review steps, the same as for an individual client.