Collect the fees on a loan application before you disburse
Summary
Collect and confirm every fee on a loan application, so a loan is never funded with fee income still outstanding.
About 6 minutes - 10 steps. Also called: application fee, loan charges, Fee & Payments, pay loan fee.
Sign in with your email to read the rest of this article, track what you have finished, and earn your certificate.
Sign inPrerequisites
- A Wakandi Admin Portal sign-in with access to Accounts and Applications.
- An application already created and sitting in your queue.
- Your fee schedule to hand, so you know which charges apply.
- Teller access under Transactions, if you will take the money at the counter.
Step-by-step
Open the Wakandi Admin Portal and sign in.
In the left sidebar, expand Accounts and click Applications. The page opens on the Pending tab.
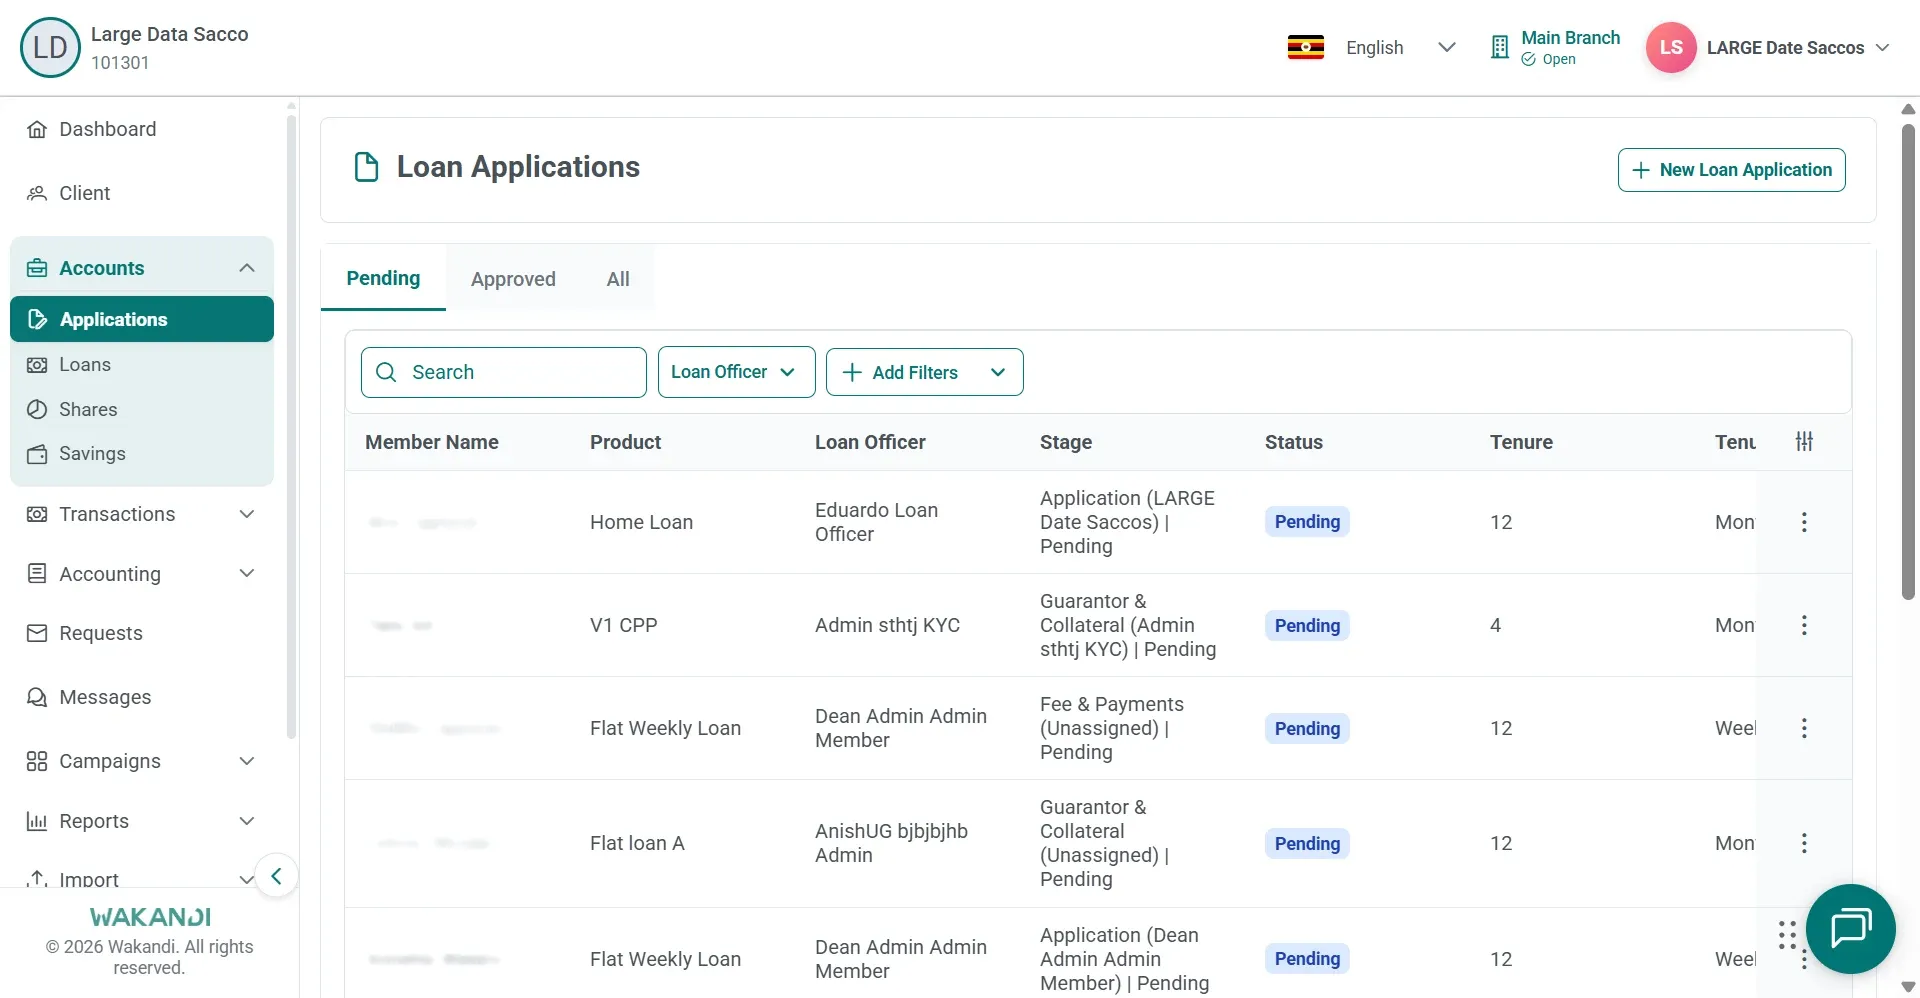
Figure 1: Loan Applications page open on the Pending tab, listing member applications with product, stage and status Find the member's row and click it to open the application.
In the workflow stepper, click 3 Fee & Payments. Wait until the step has finished loading.
Read every item under Charges & Fees and Insurance. Confirm each amount and whether it is paid. Agree the total with the member.
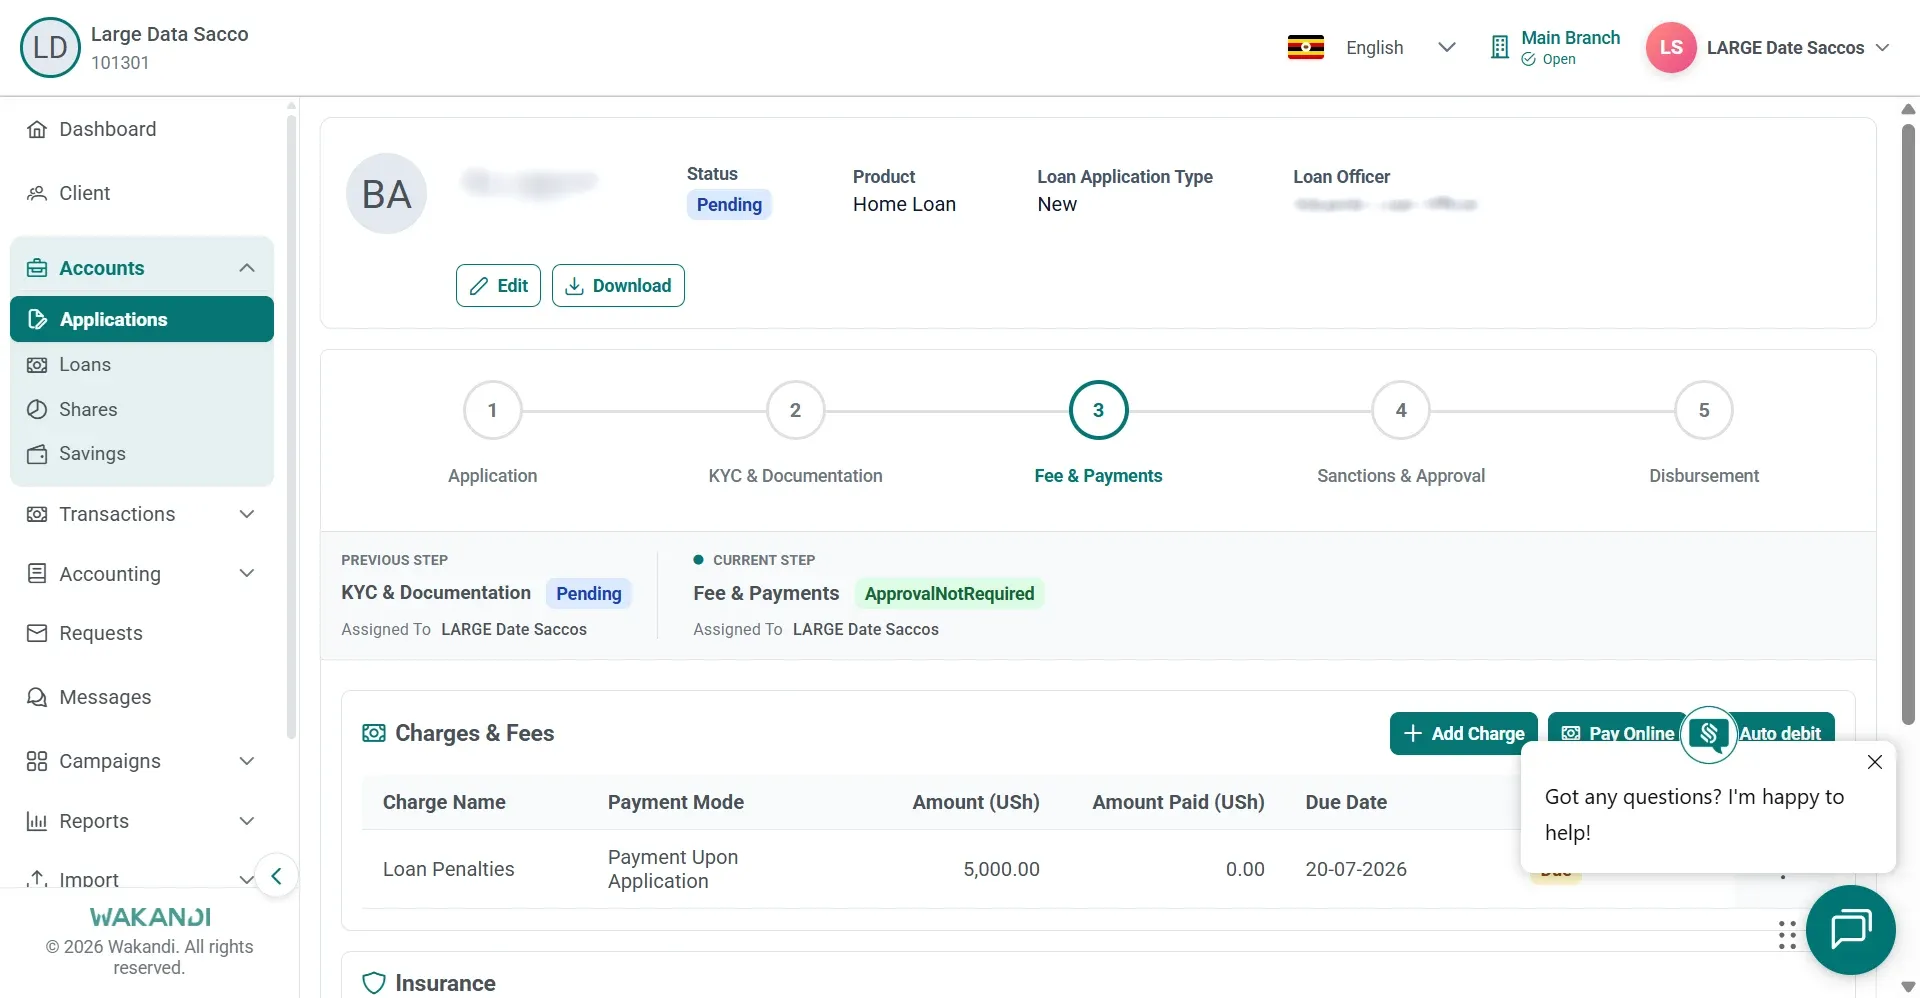
Figure 2: Fee and Payments step showing the Charges and Fees table with Add Charge, Pay Online and Auto debit If a fee is missing, click Add Charge and complete the charge form on screen.
Collect the money. Click Pay Online for the online payment flow, or Auto debit where that collection method applies.
To take payment at the counter instead, open Transactions > Teller, then New Transaction > Client Transaction, and click Loan Application Fee. Search and select the account, enter the fee amount and details, then submit.
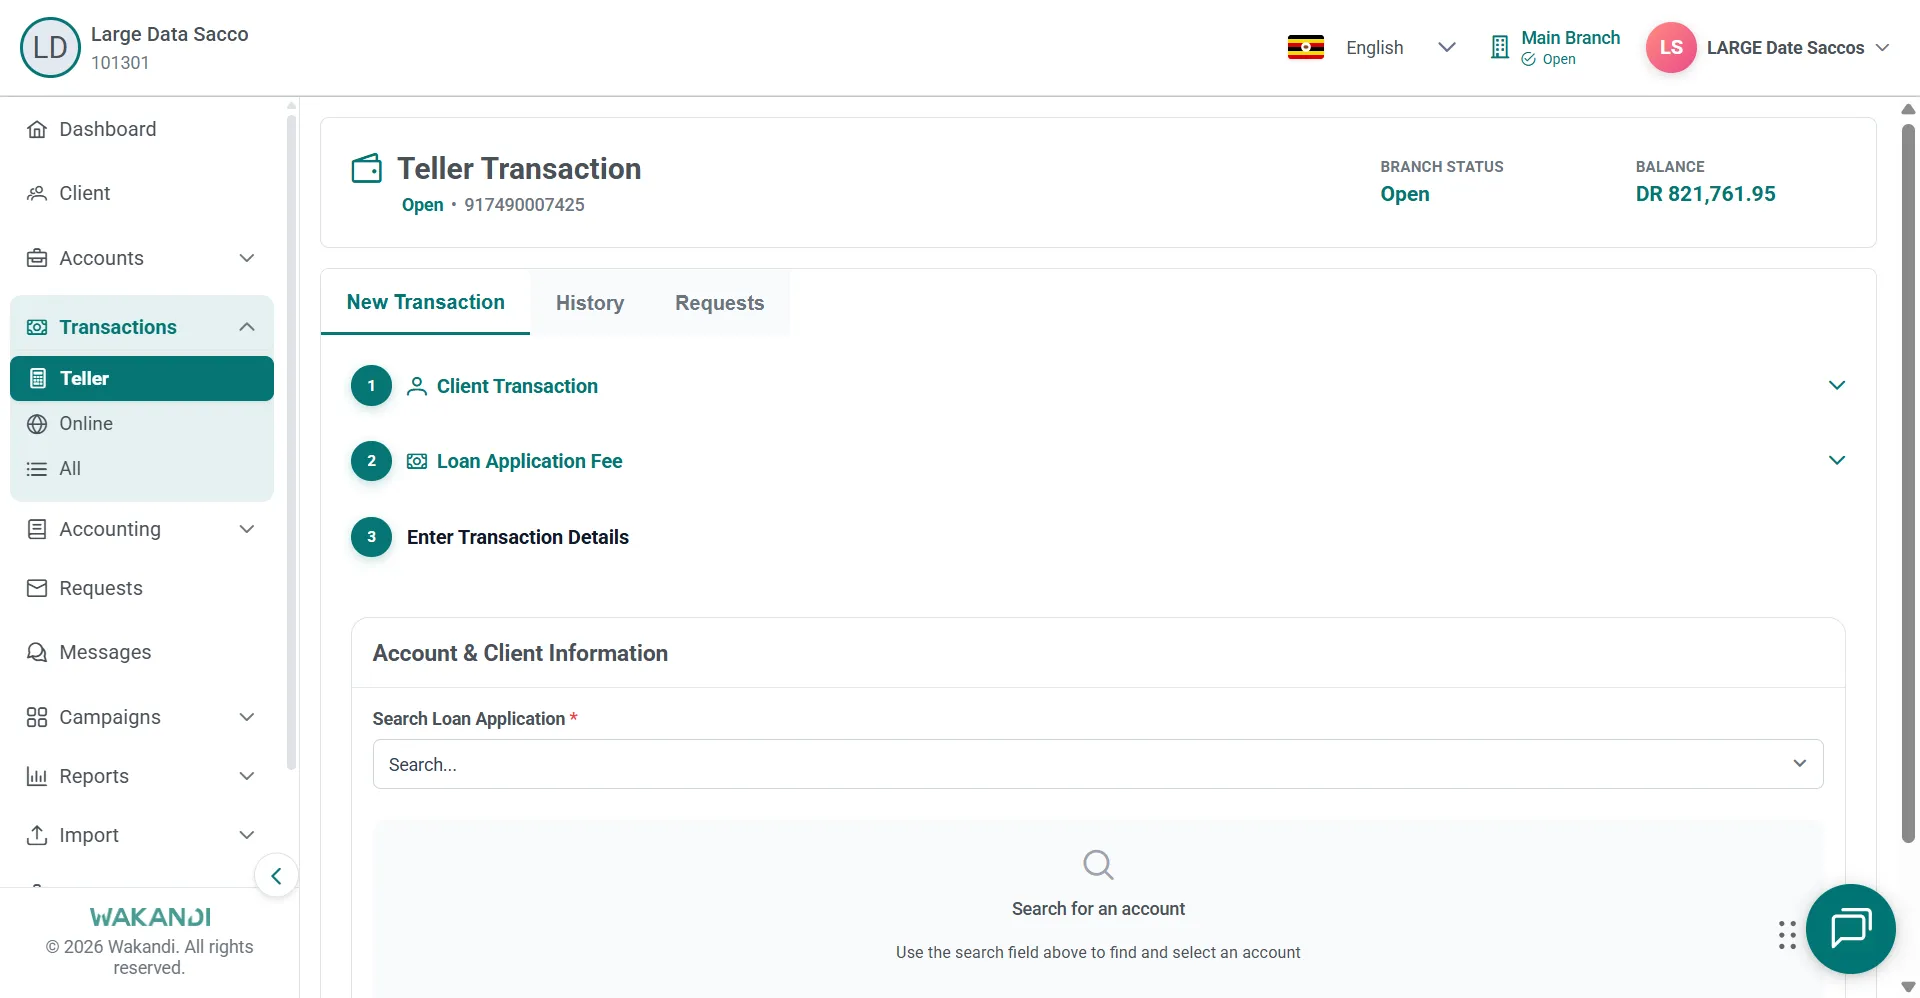
Figure 3: Teller New Transaction with Loan Application Fee chosen and the Search Loan Application field awaiting an account Confirm the fee status after the payment action completes. Continue to the next workflow step only when the fees are in order.
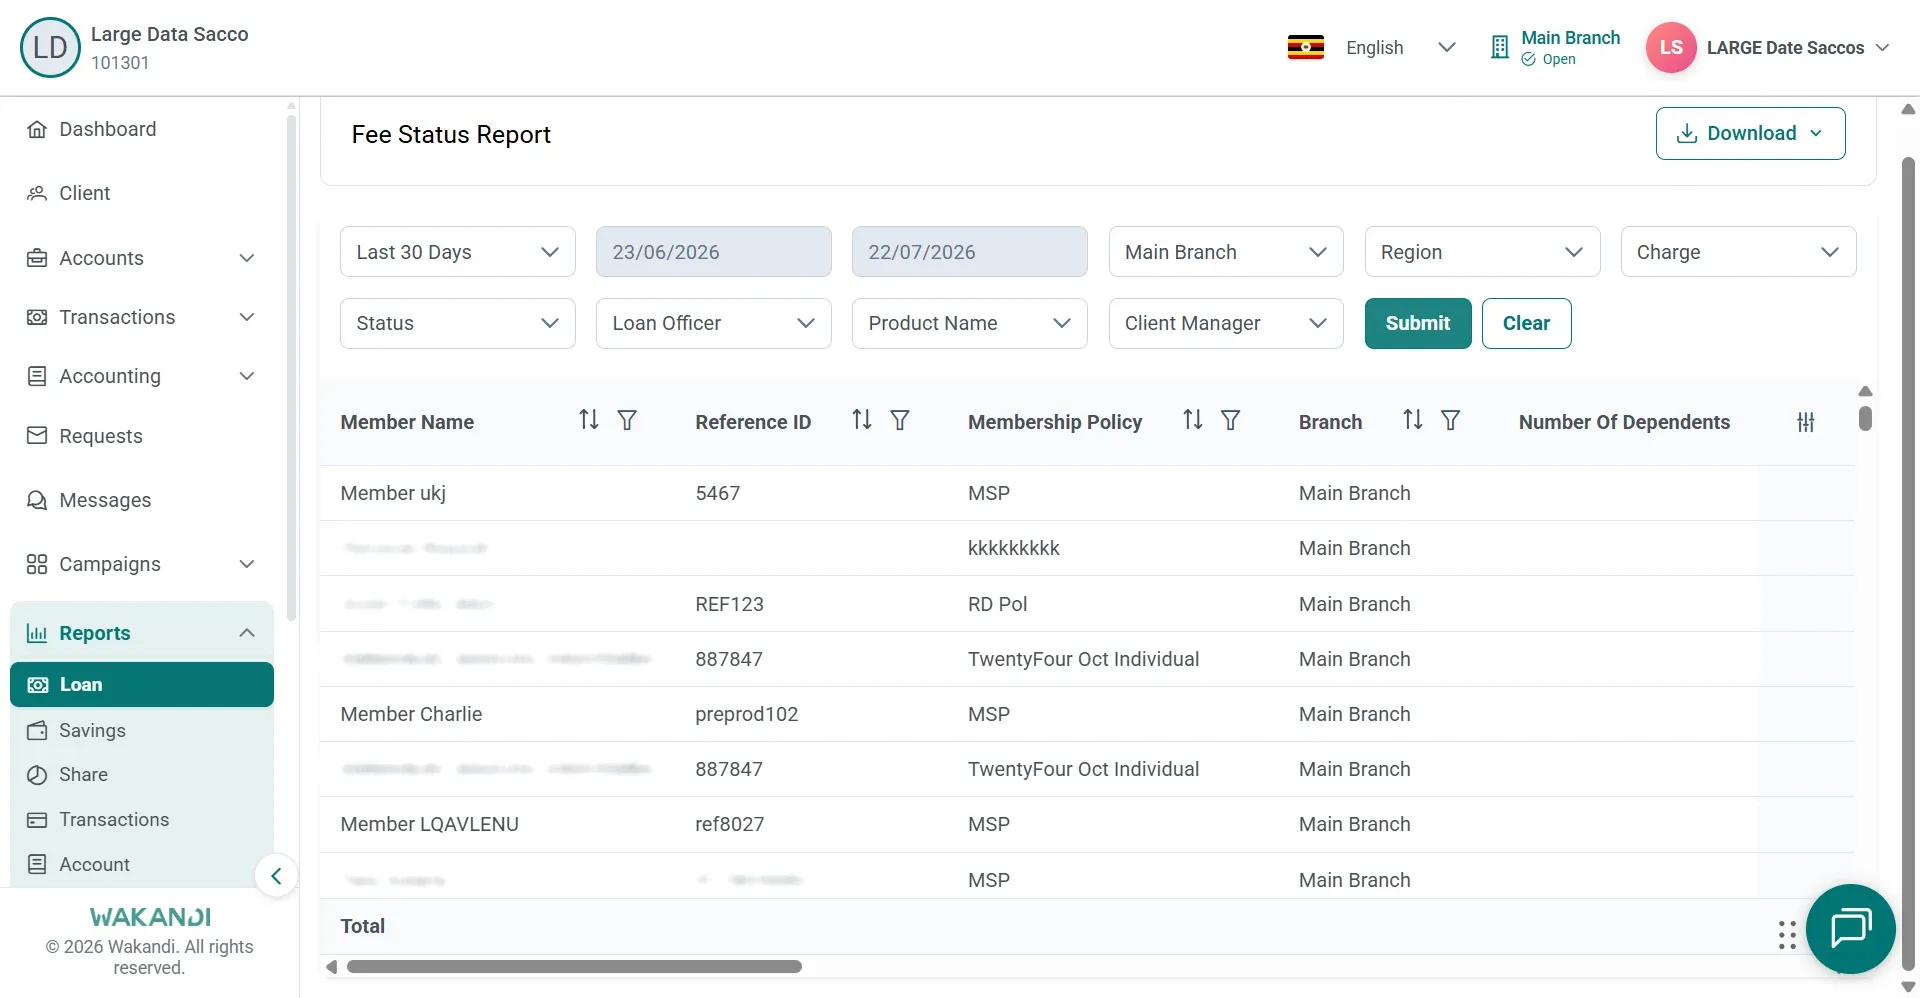
To check what has been collected, expand Reports, click Loan, then click the Fee Status Report card. Set your filters and click Submit.
Common pitfalls & FAQ
- Can I disburse now and collect the fee later? No. Do not skip unpaid required fees before moving to disbursement.
- The payment failed. Leave a note on the Notes tab. Check the account and payment details, then retry.
- The same charge is listed twice. Review the charges already there before you click Add Charge, so you do not duplicate one.
- The loan is already open and a charge is unpaid. Open Accounts > Loans, open the loan and click the Charges tab. Compare Amount (USh) with Amount Paid (USh) to see what is still outstanding.
- The Fee Status Report comes back empty. Check your filters and your branch access, then click Submit again.
- I need a copy for the file. With results on screen, click Download and choose Excel, CSV or PDF.