Loan approvals now respect roles and your Credit Product Policy
Summary
Approve, reject or hold a loan application in CAMS. Each stage is limited by your role and by the loan product's Credit Product Policy.
About 4 minutes · 9 steps. Also called: loan approval workflow, approval chain, loan stages.
Sign in with your email to read the rest of this article, track what you have finished, and earn your certificate.
Sign inPrerequisites
- Your CAMS sign-in, with a role that covers the stage you need to act on.
- The member's name.
- An approved Credit Product Policy for the loan product.
Step-by-step
Sign in to CAMS with your staff account. You land on the Dashboard.
In the left menu, click Accounts, then Applications. The Loan Applications page opens on the Pending tab.
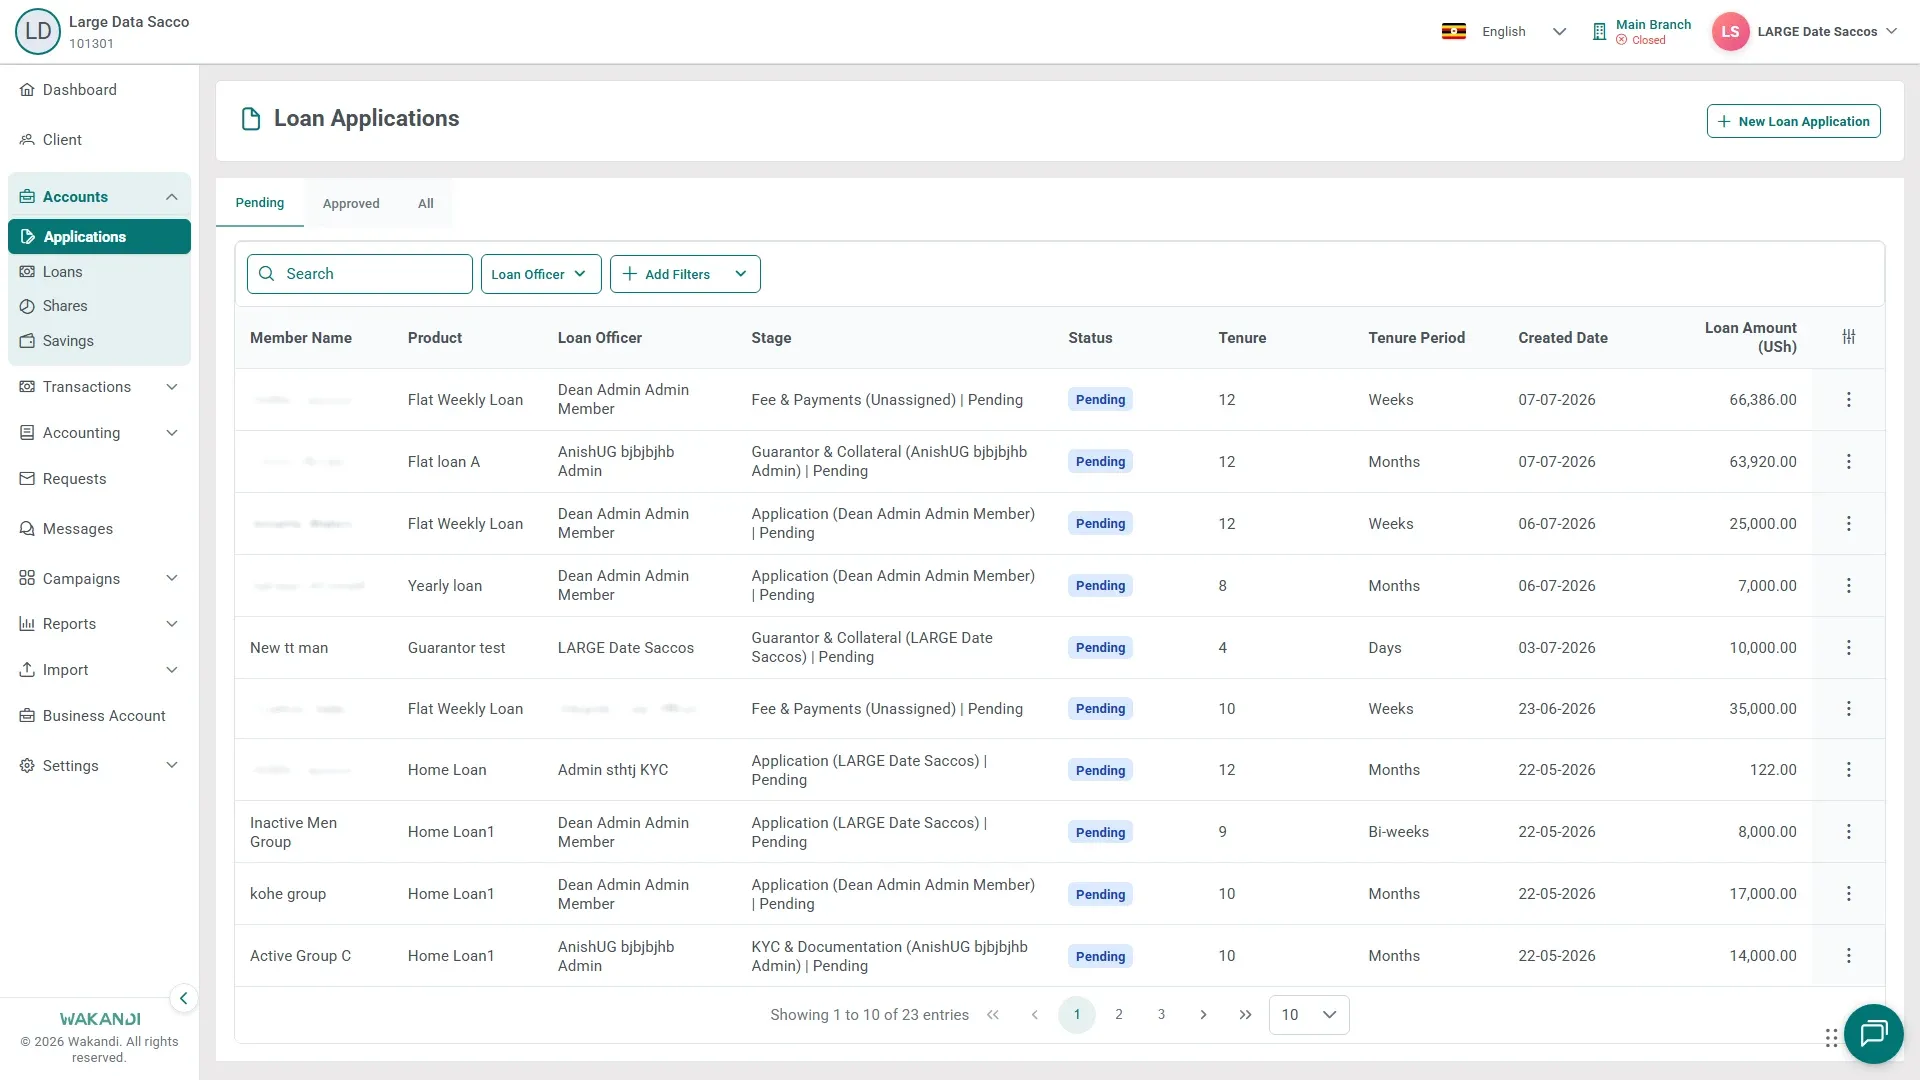
Type the member's name in Search, or pick a name in the Loan Officer filter. The list narrows.
Read the Stage and Status columns. Stage shows which step the application waits at.
Click the row. The detail screen opens with the workflow stepper: 1 Application, 2 KYC & Documentation, 3 Fee & Payments, 4 Sanctions & Approval, 5 Disbursement.
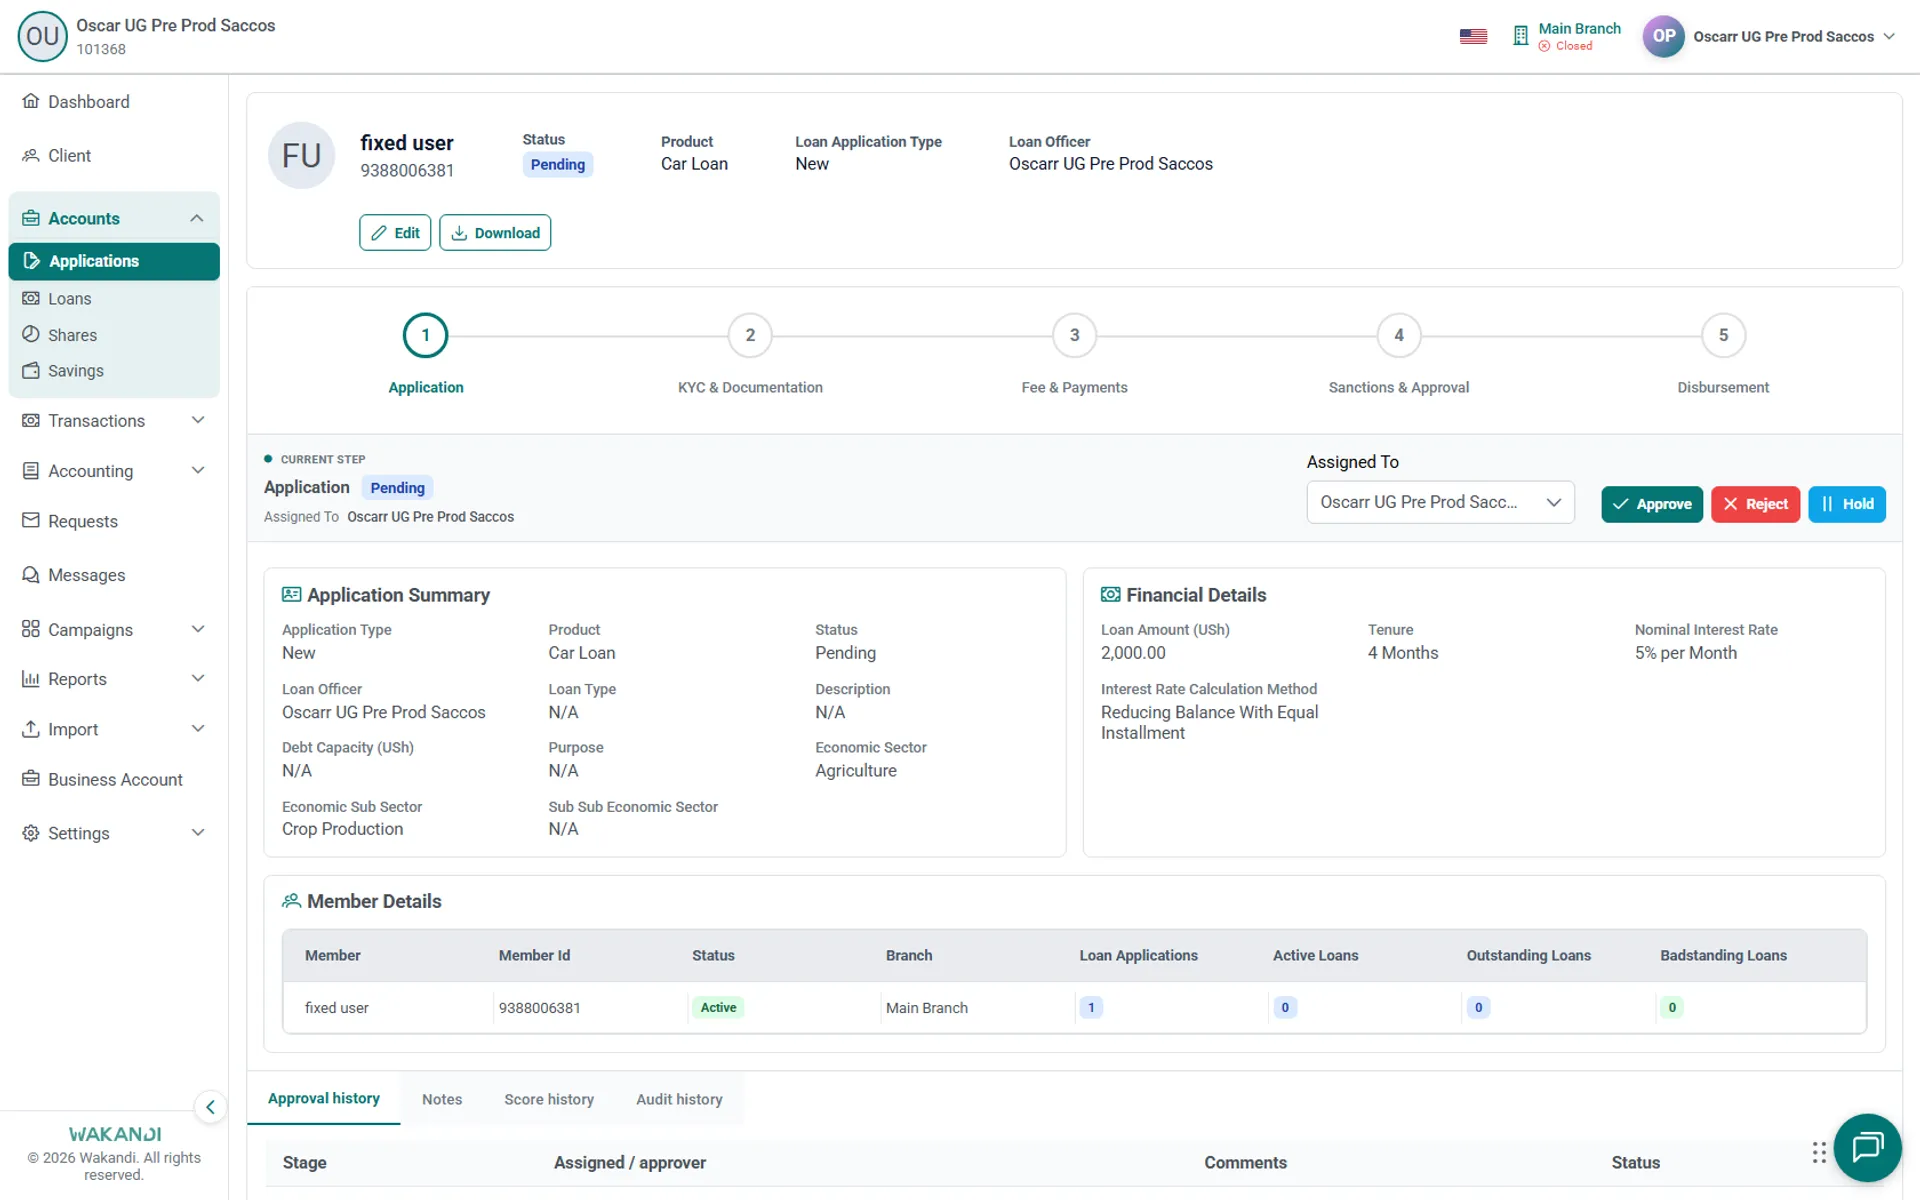
- Check Current Step and Assigned To. You act only at the stages your role covers, so hand the stage over if it belongs to someone else.
Note: Access to the loan module is not enough on its own. Before release 26.06.01.06 an administrator could approve at any stage and skip the ones between. Now the role decides, and a later stage stays closed until the earlier ones are approved. Creating and submitting loans works as before.
- Read Application Summary, Financial Details and Member Details, then click Approve, Reject or Hold. Complete the confirmation and the workflow moves on.
Warning: 5 Disbursement releases money to the member. Check the amount and destination under Loan disbursement details first.
Click Approval history near the bottom. Each decision gets a row: stage, approver, comments and status. Audit history, further along the same tab strip, shows the system trail.
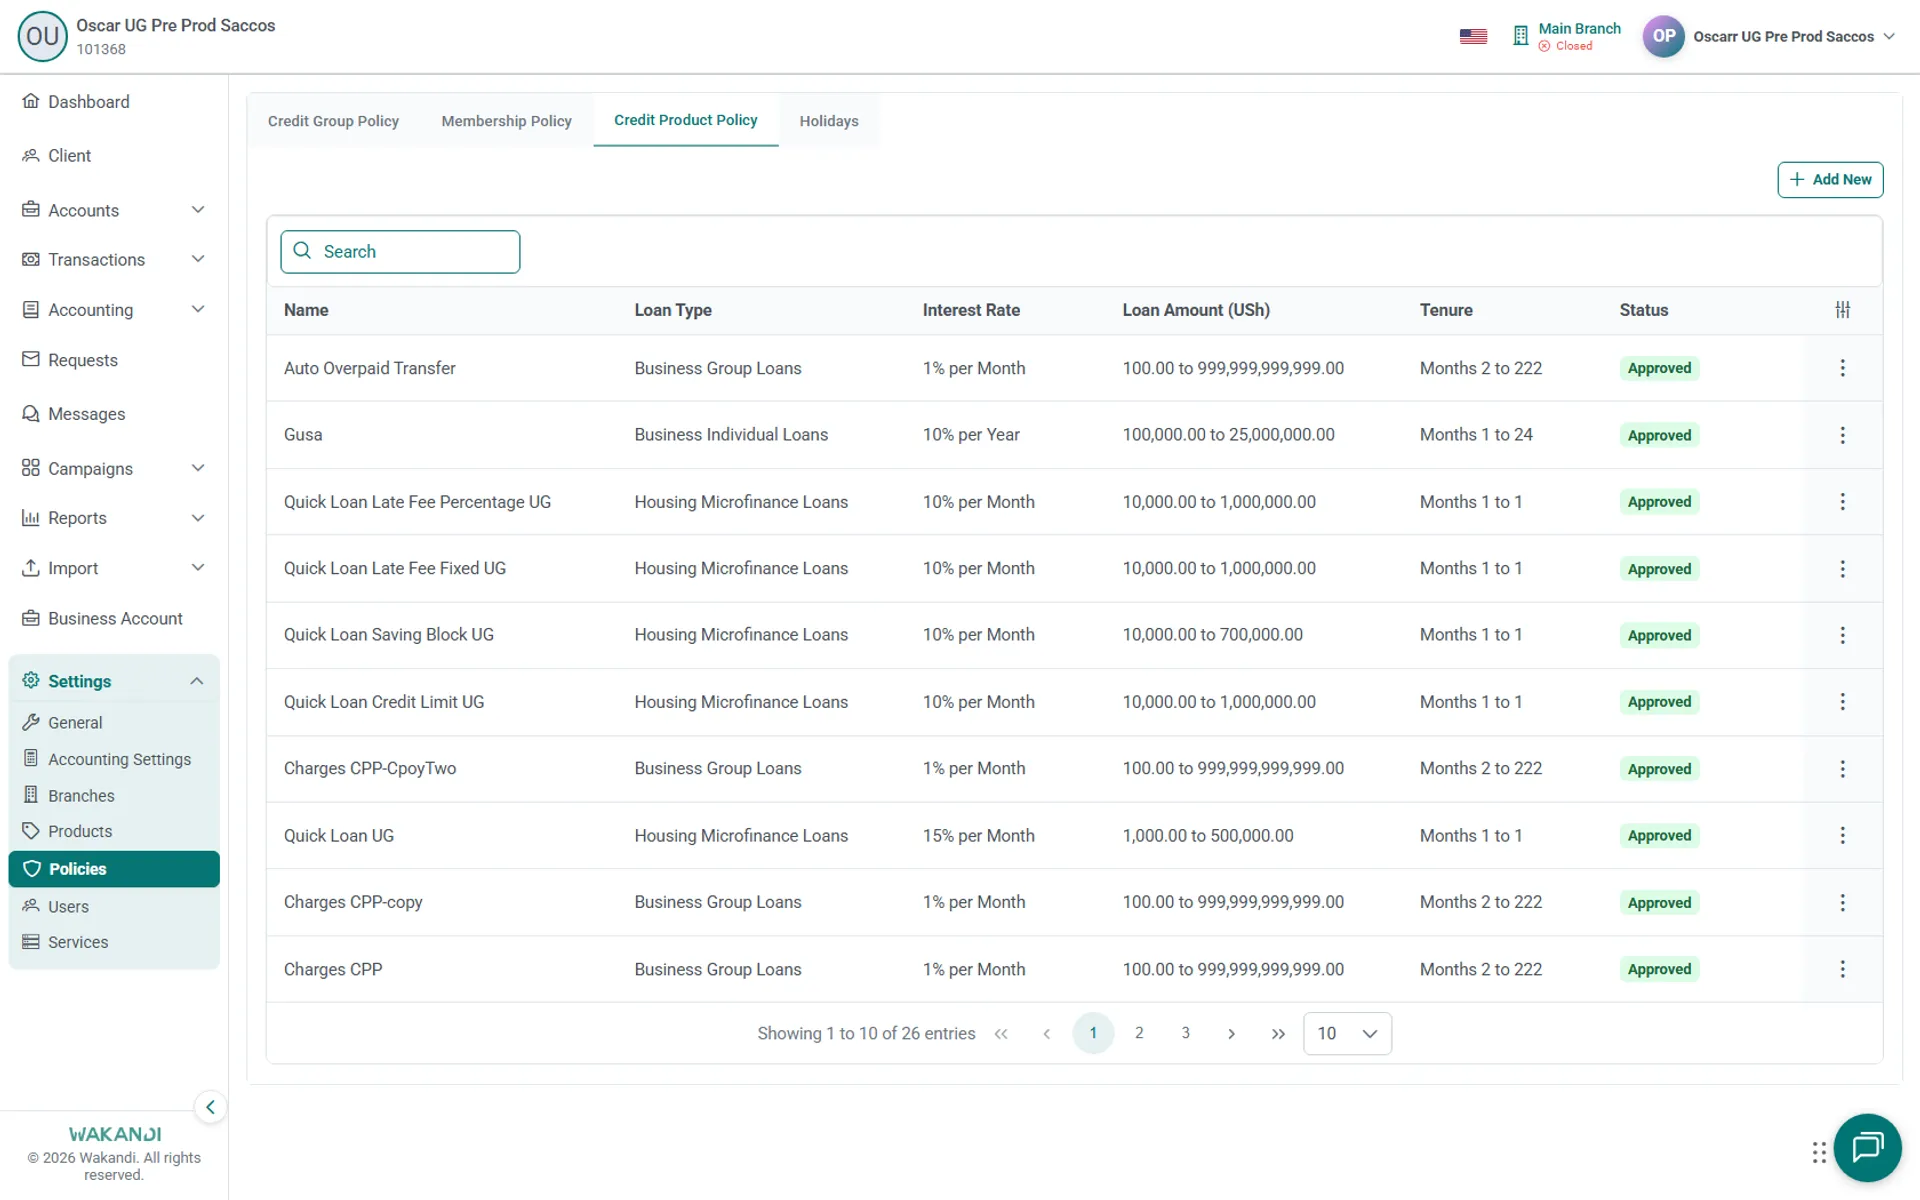
In the left menu, click Settings, then Policies, then the Credit Product Policy tab. A policy sets each product's interest method and rate, allowed loan amount and tenure, and the provisioning rules that follow.
Common pitfalls & FAQ
- I can't approve the stage. Your role does not cover the Current Step. Ask an administrator to check it under Settings → Roles.
- Can I skip ahead to Disbursement? No. Each earlier stage has to be approved in turn.
- I can't find the application. It may have moved on, so try the Approved tab or All. If the list looks empty, let it load, then clear Search and the Loan Officer filter.
- Approval history says No records found. No decision is recorded yet, so the application is still early in the workflow.
- Something is missing. Use Hold, then Add Note on the Notes tab so the next reviewer knows what to chase.
- Who sets the rules? A Credit Product Policy needs Approved status before use, and each loan stores the Product Policy Version it was booked against. Save a policy change only after credit approval, and tell your team, because a change can affect new applications right away.