How to add a loan product
Summary
Set up a loan product: the template that fixes amount, interest, tenure and repayment rules for every loan created from it.
About 4 minutes · 8 steps. Also called: loan type, loan scheme, credit product.
Sign in with your email to read the rest of this article, track what you have finished, and earn your certificate.
Sign inPrerequisites
- A CAMS sign-in with Settings and product rights.
- Interest rates created on the Interest Rate tab. See Fees and rates.
- The amounts, rates and repayment rules agreed with finance and credit.
Step-by-step
Sign in to CAMS. See Signing in to CAMS.
In the left menu, expand Settings, then click Products. Product Setup opens on the Loan Product tab.

Figure 1: The Product Setup page open on the Loan Product tab, listing existing loan products with their interest rate, amount range and tenure Search the list by name first, so you do not create a duplicate.
Warning: Changing a product members already borrow on affects the loans created from it afterwards. Agree changes with credit operations first.
Click the add (+) action. The create form opens.
Enter a Name and Description, then choose the Loan Type, such as Business Individual Loans.
In Terms, set the Minimum and Maximum Loan Amount, the Tenure Period, any Grace Period and whether interest applies during it. Add a Multiplier on Savings/Shares if holdings cap the loan.
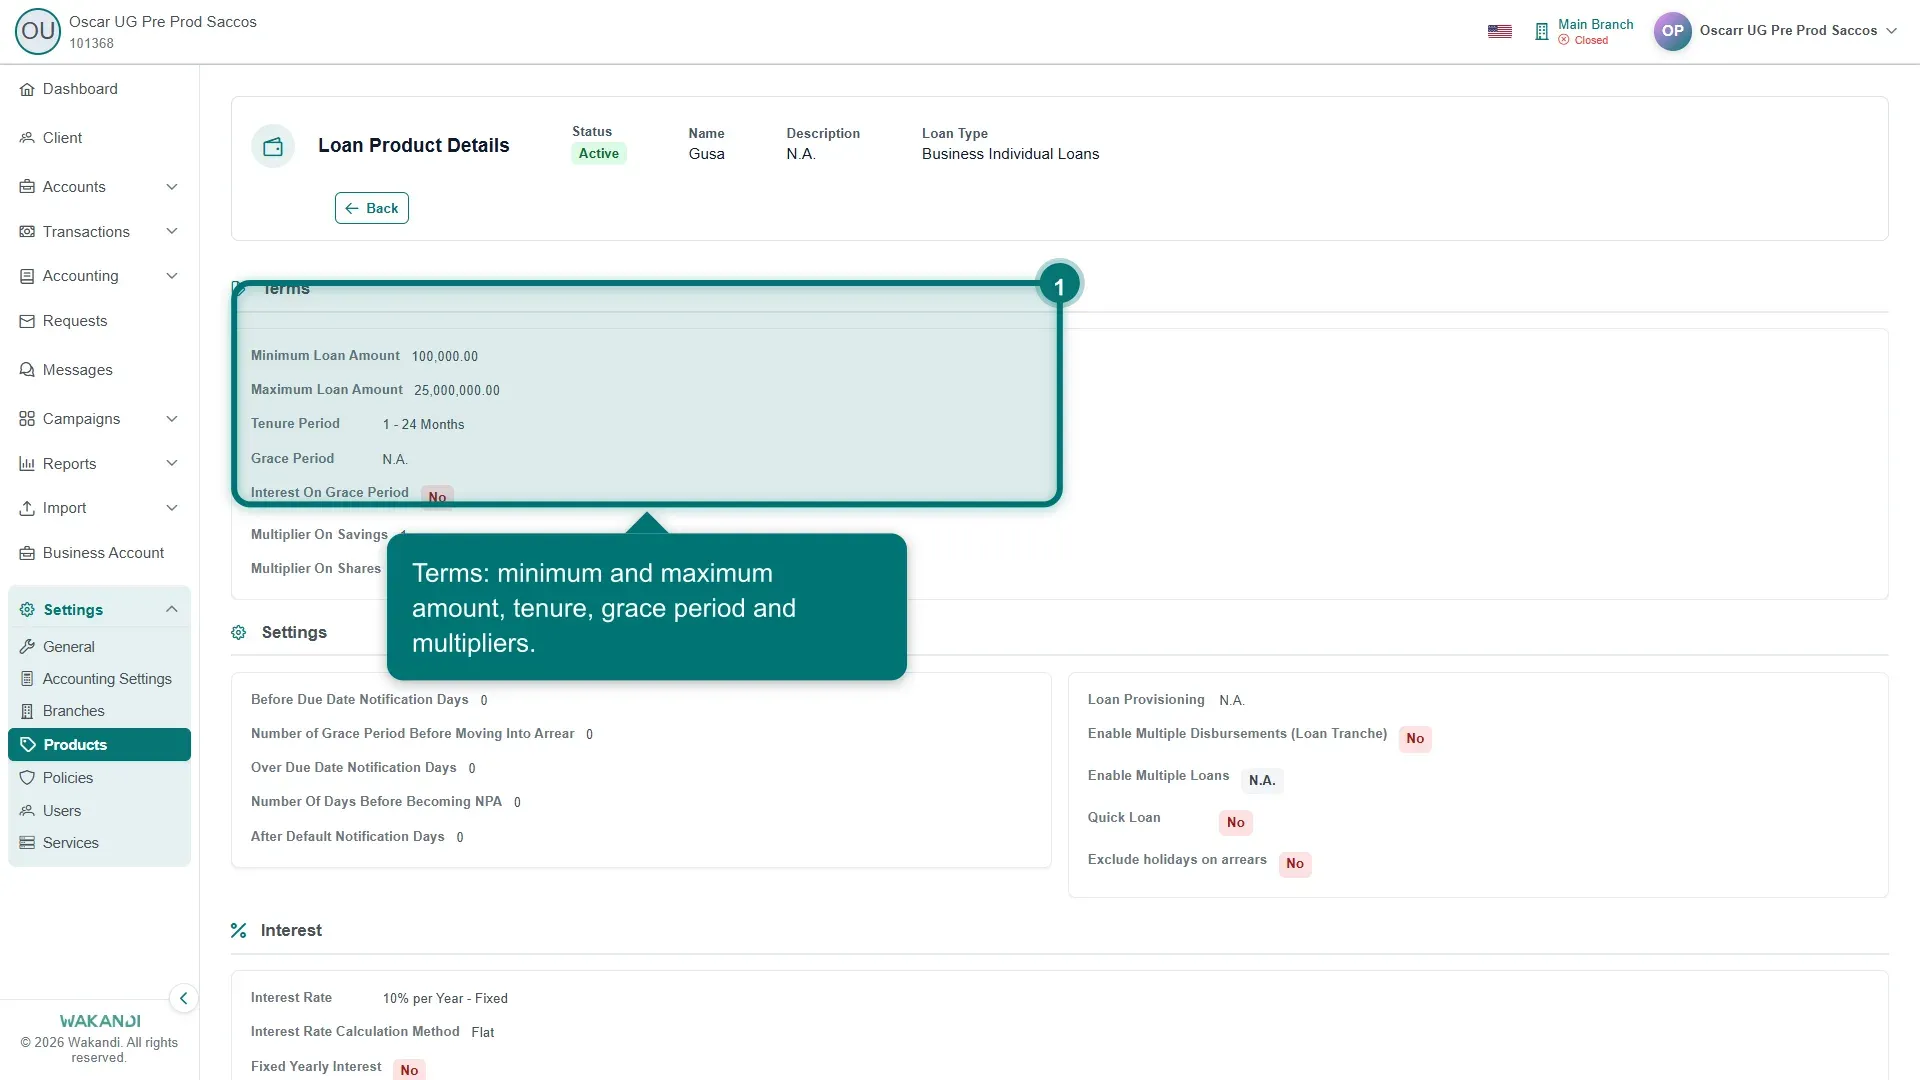
Figure 2: The Terms section of a loan product, showing the minimum and maximum loan amount, tenure period and grace period In Interest, set the Interest Rate and the Interest Rate Calculation Method. Flat charges interest on the original amount; Reducing Balance charges it on what is still owed. In Income, set the Configure Type (such as Accrual) and when interest accrues.
In Repayments, set the Repayment Strategy (the payoff order across charges, interest and principal) plus the advance-payment, non-working-day, recalculation and compounding rules. The next lesson finishes the form.
The rest of this course follows the loan itself. Capture and appraise an application (lessons 3–4), add guarantors and approve (5–6), pay out (7), then repay, top up, reschedule and write off (8–11). An application moves through approval under Accounts > Applications; once disbursed, the account lives under Accounts > Loans.
Common pitfalls & FAQ
- There is no add (+) button. Your role may be view-only. Ask an administrator for product rights.
- The rate I need is not offered. Create it on the Interest Rate tab first, then reopen the form.
- Can members borrow on it now? Not yet — the product must be saved and set to Active first.